Mappers
Mappers convert messages from one type to another. They define the translations between different message types, usually between a product-specific message and one or more normalized message formats. Mappers contain mappings, that define the translation of each field in the message. Mappers can perform calculations, unit conversions, time format conversions, apply regular expressions with capture groups, replace literal strings, etc.
You need to be in the advanced user mode to add, configure, modify, manage mappers.
To configure a mapper you have to edit the plugin the mapper is assigned to. Plugins usually come with a set of best practices mappers applied. You can modify these mappers or create mappers from scratch.
Mapper User Interface
The mapper configuration UI is divided into two different sections.
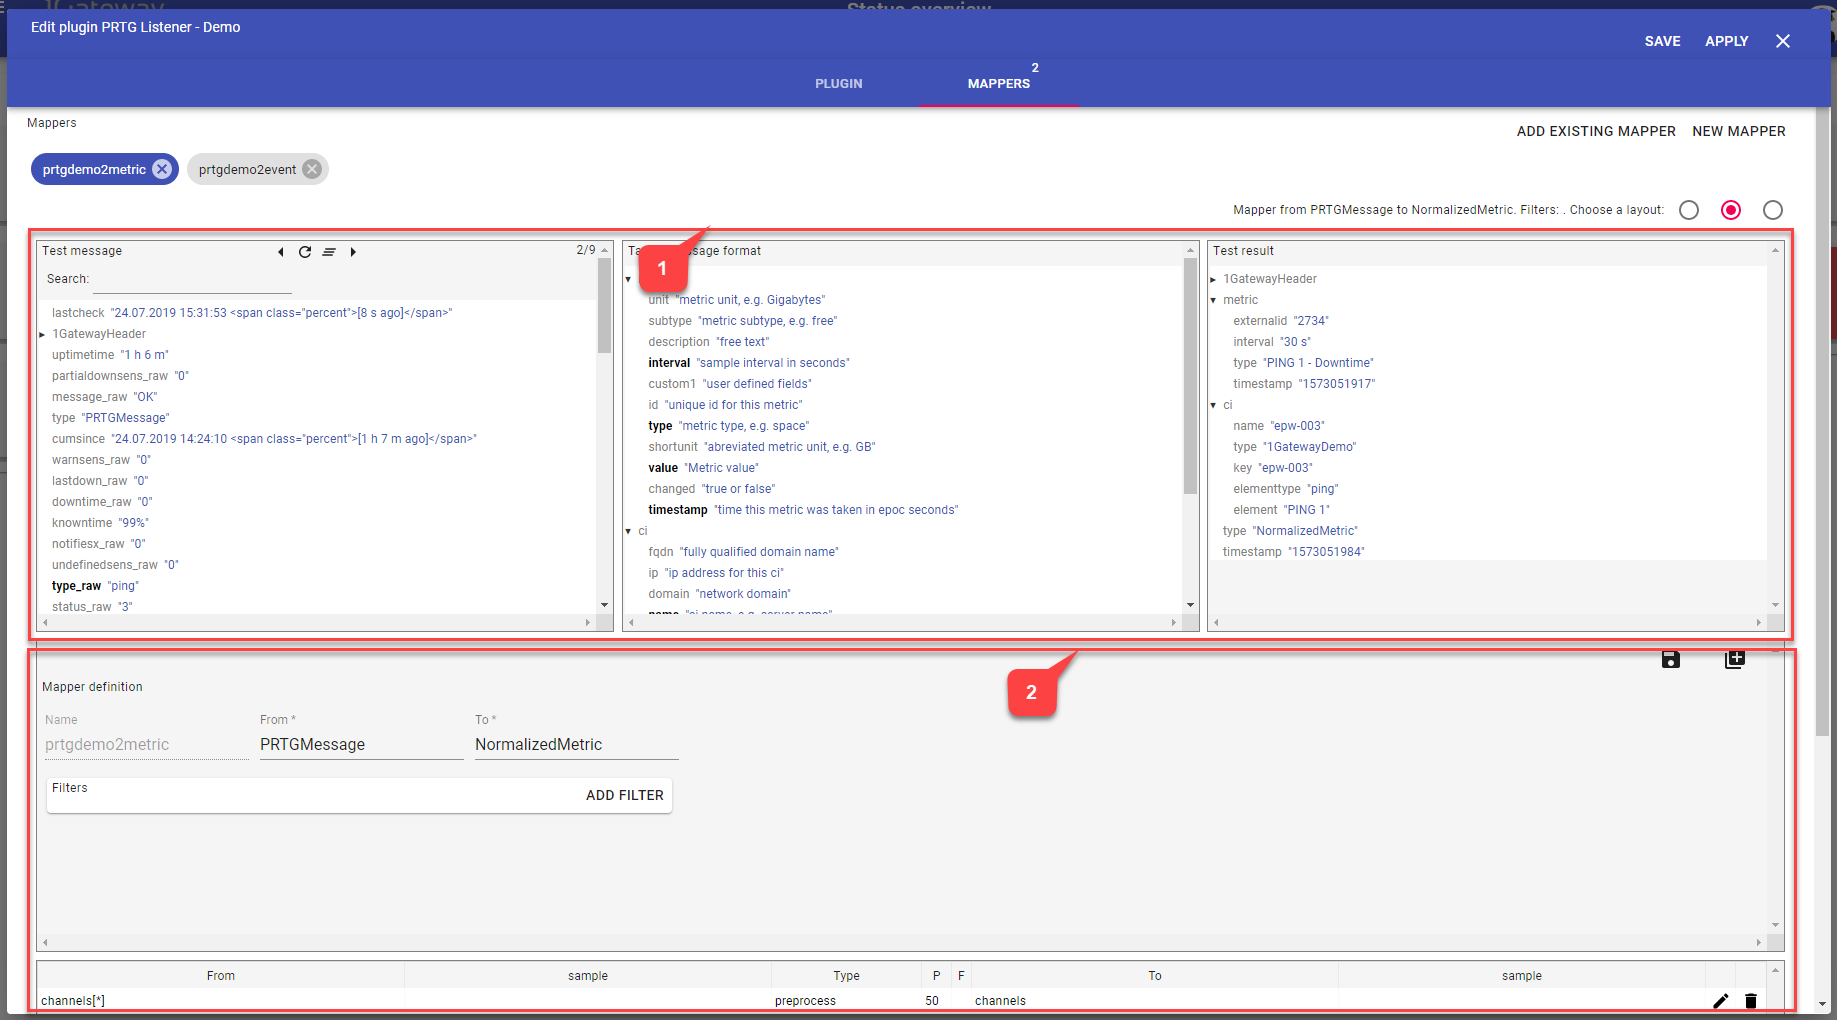
- Message section
- Mapper definition section
Choose from one of the three available layouts to arrange the sections differently.

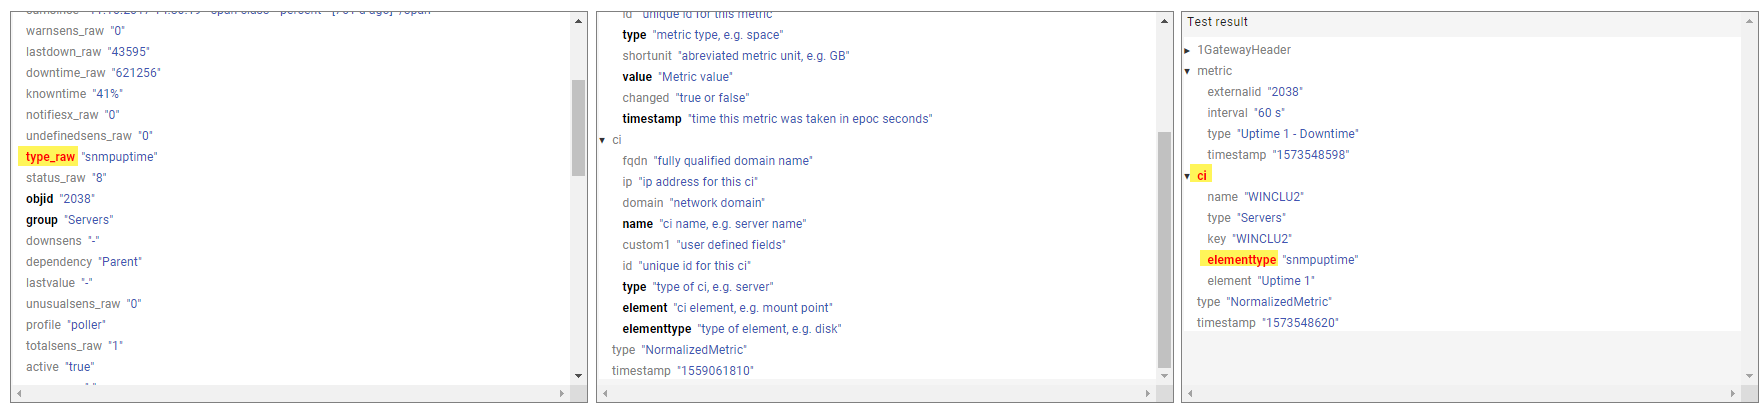
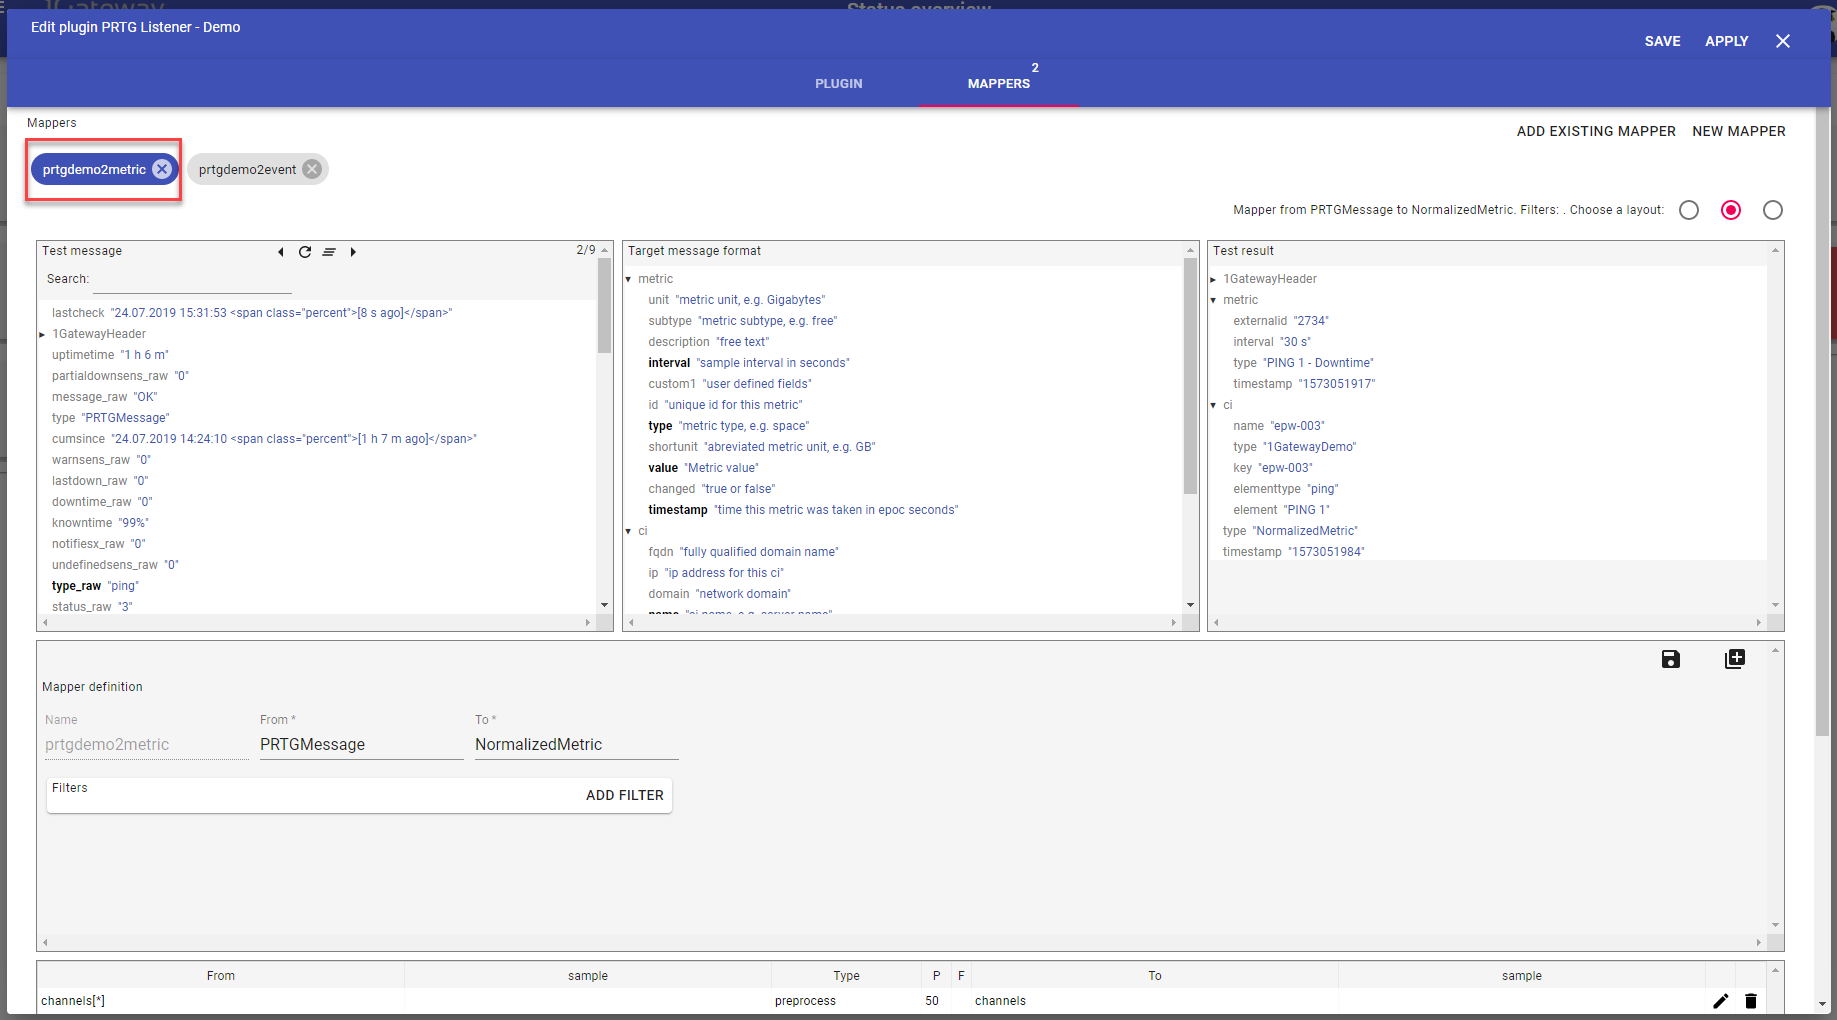
Message section
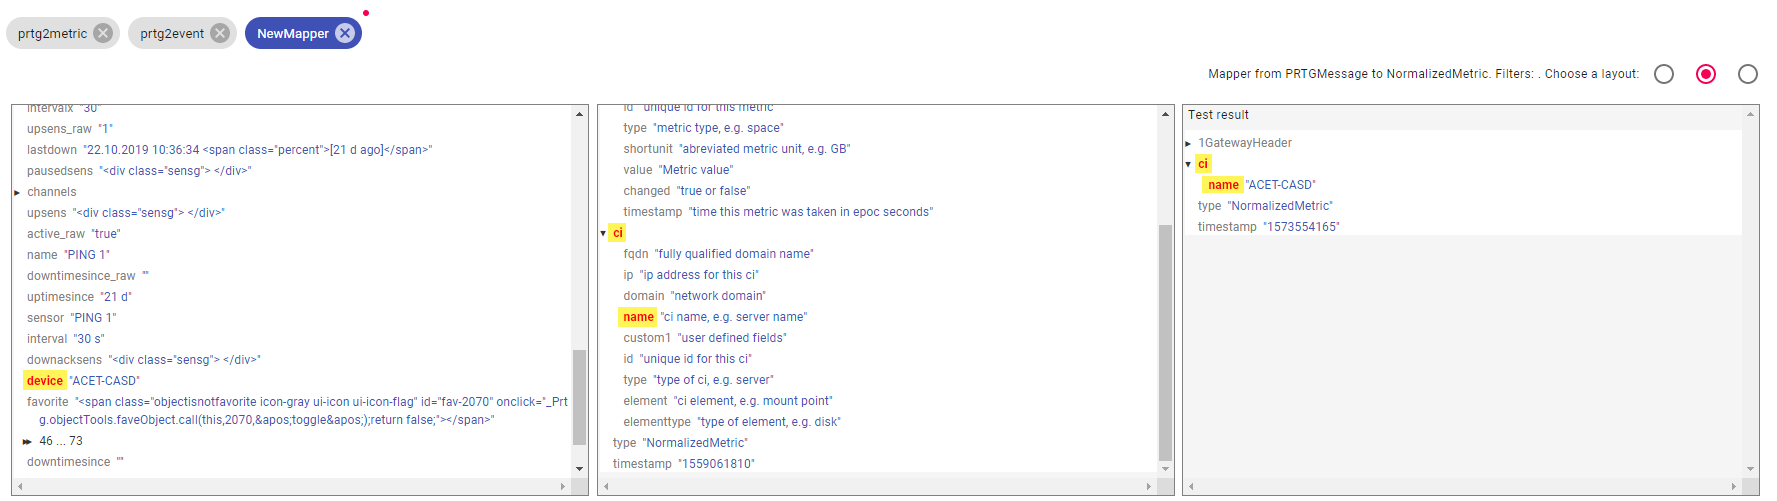
The message section consist of three areas:
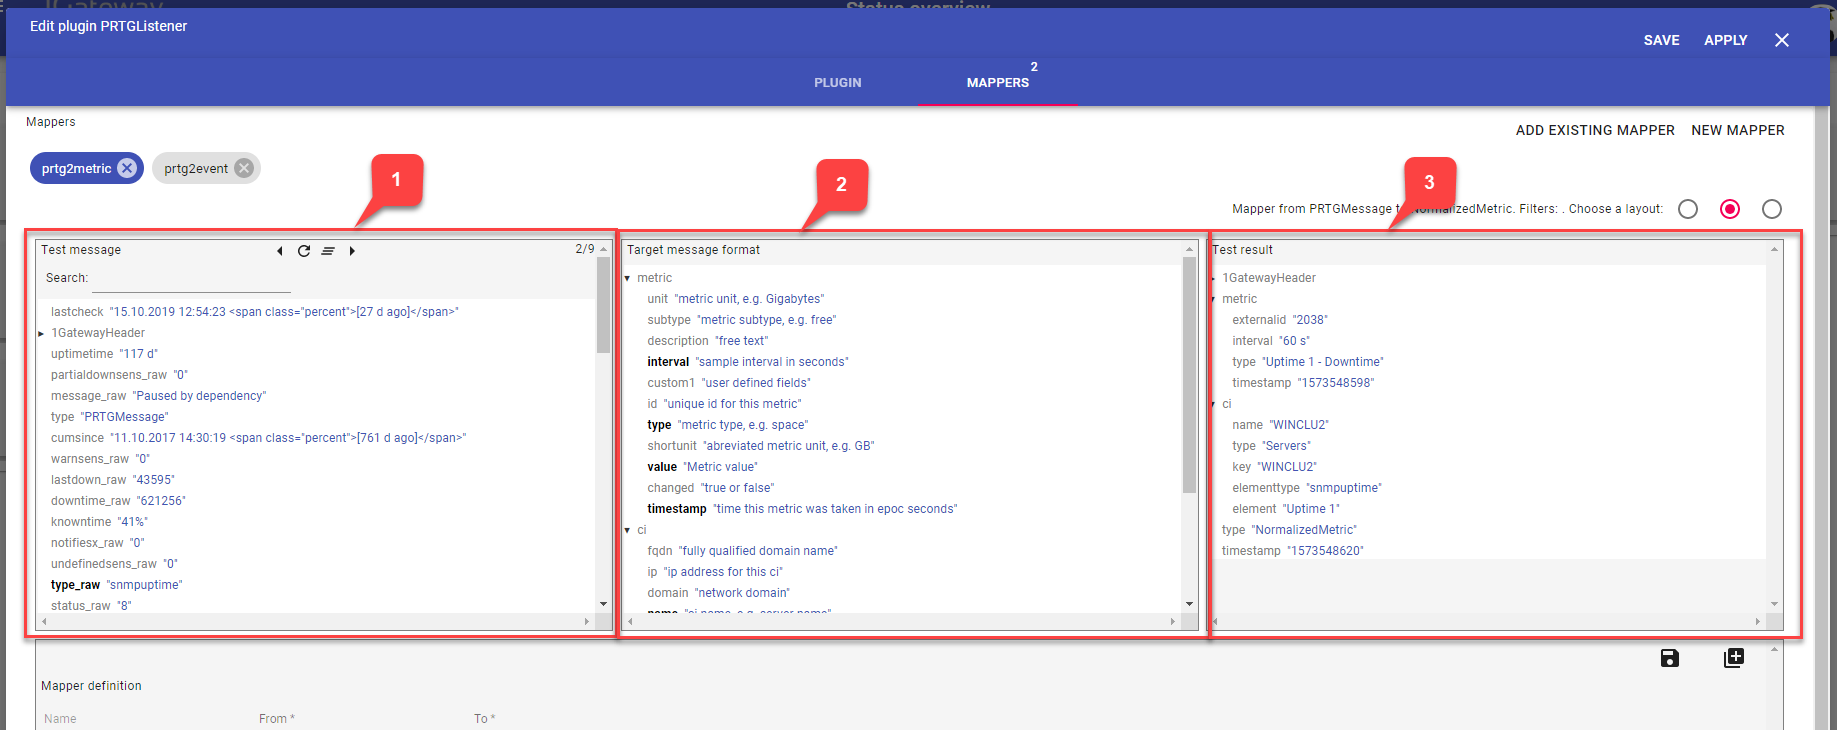
- Test Message (Source Message)
- Message in Target Message Format
- Test result (Test Message after applying the mapper)
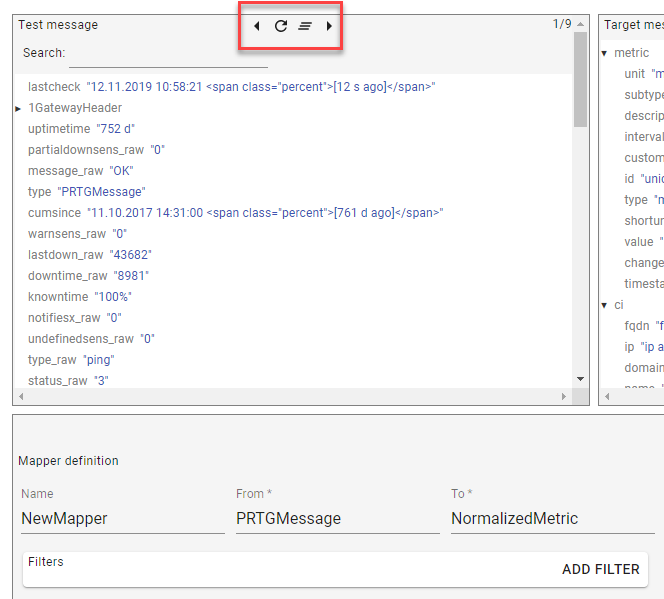
In the Test Message area, you can navigate through available message that are fetched from the plugin.
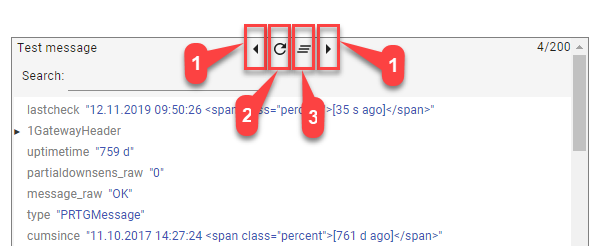
- Next / Previous Message
- Refresh Messages
- Clear message selection
The fields that are displayed in bold letters are fields that are affected by one or more mappings. Clicking on these fields shows the corresponding field(s) affected in the target message format and test result. The linked mapping definition(s) are also highlighted in the mapper definition section.
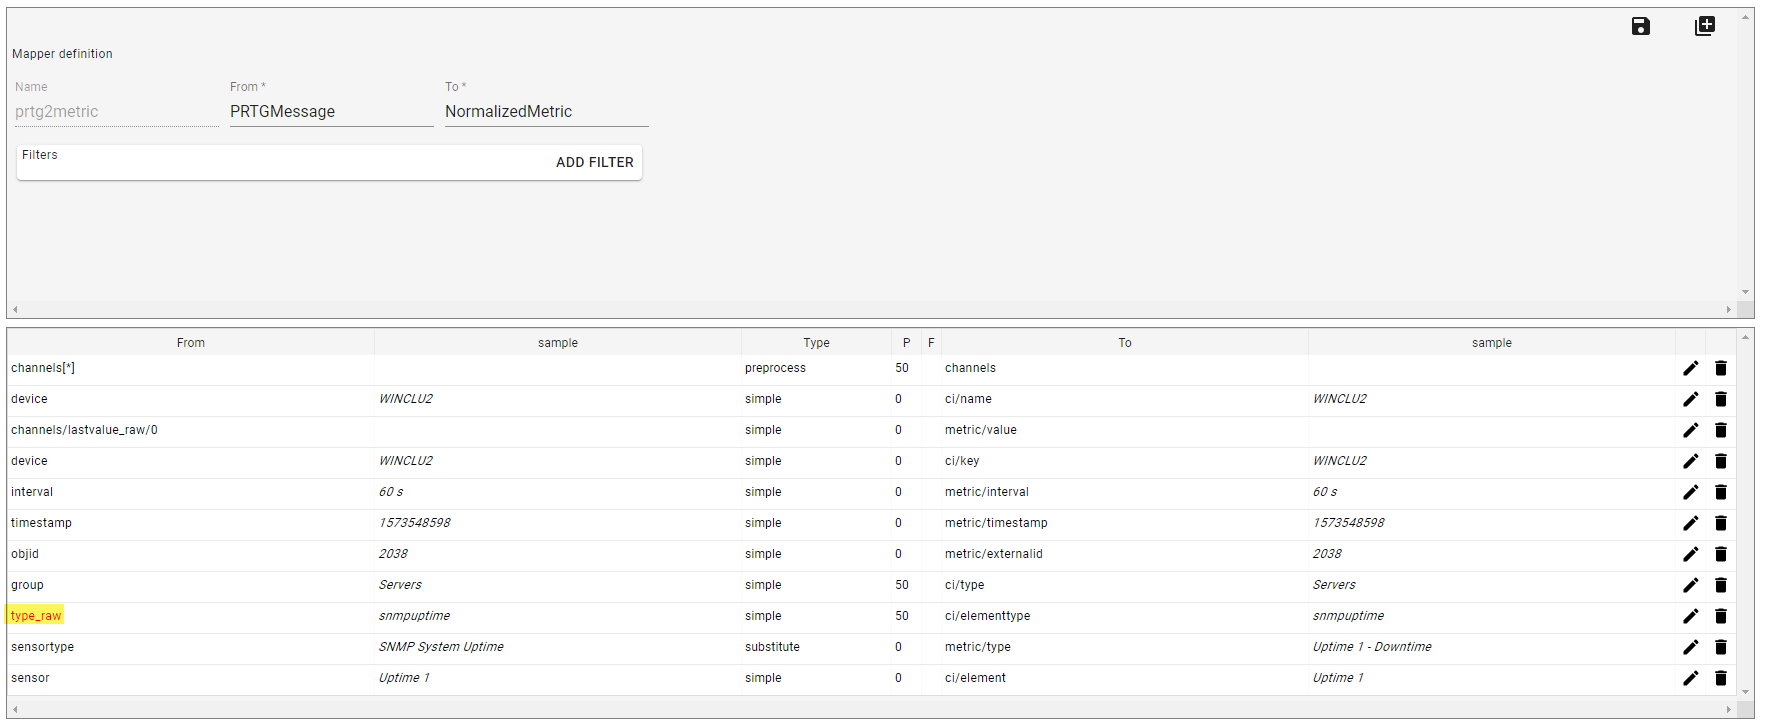
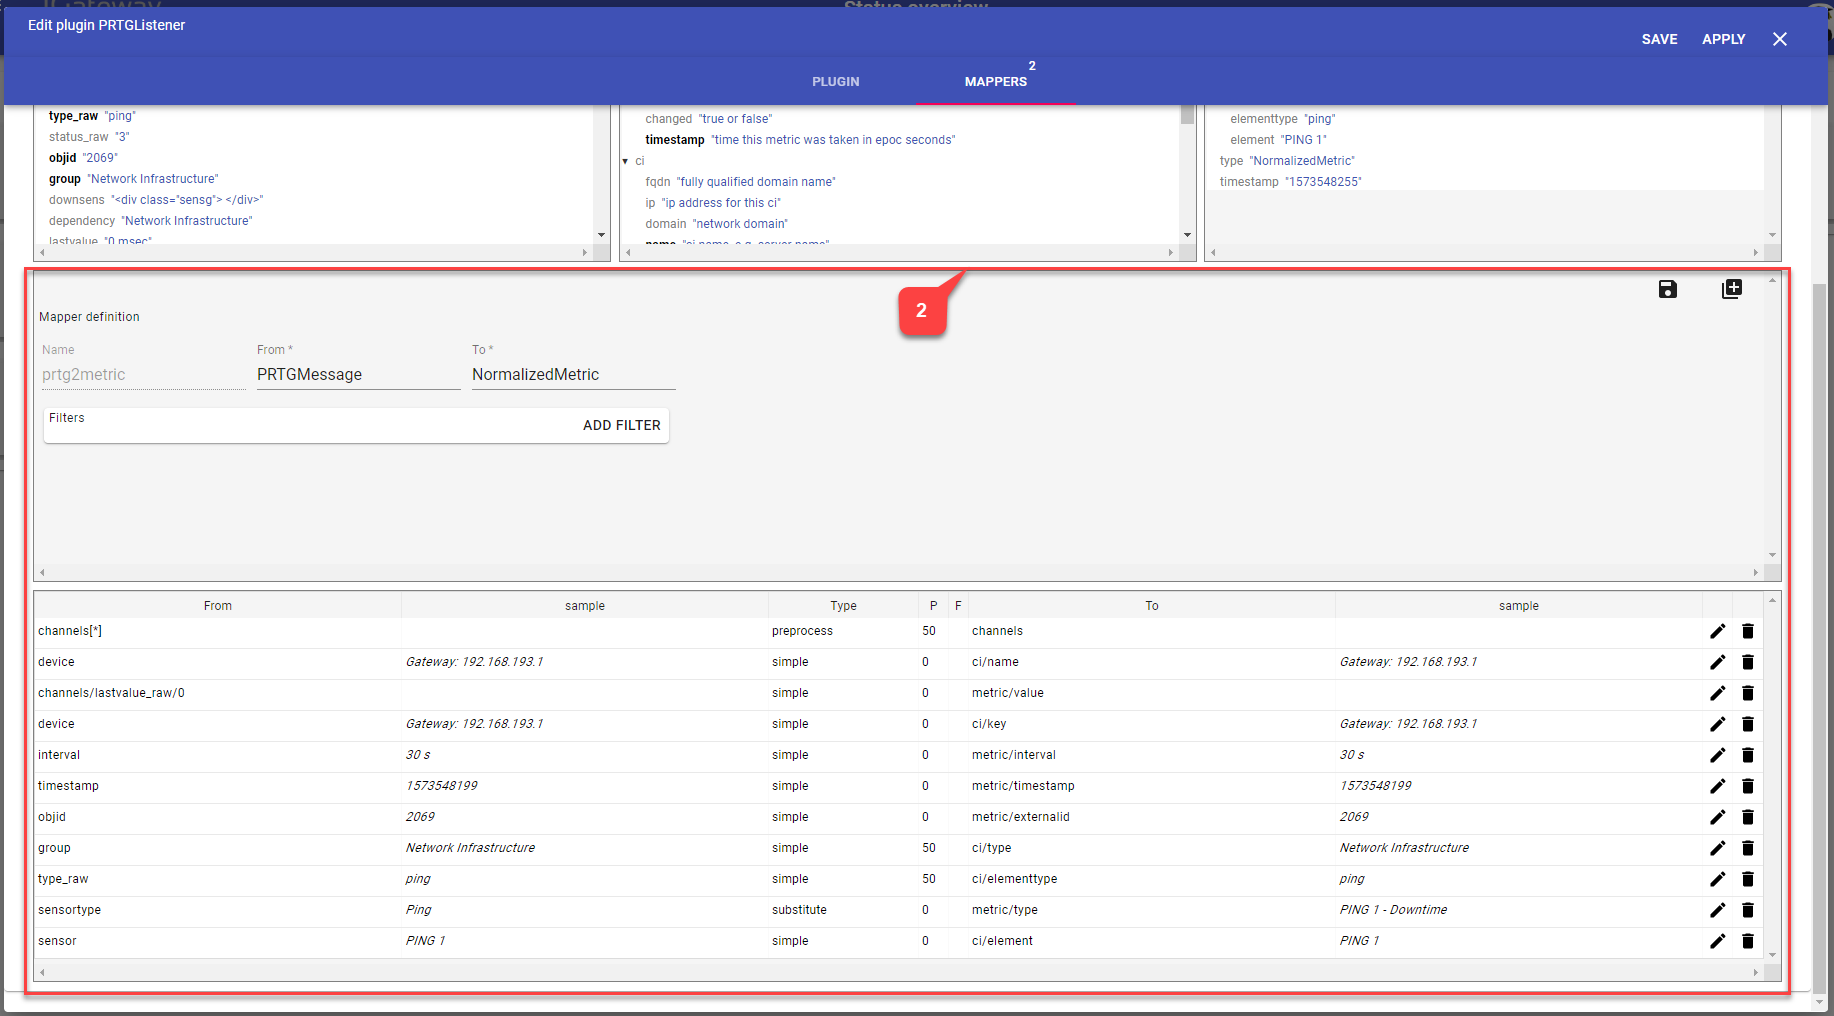
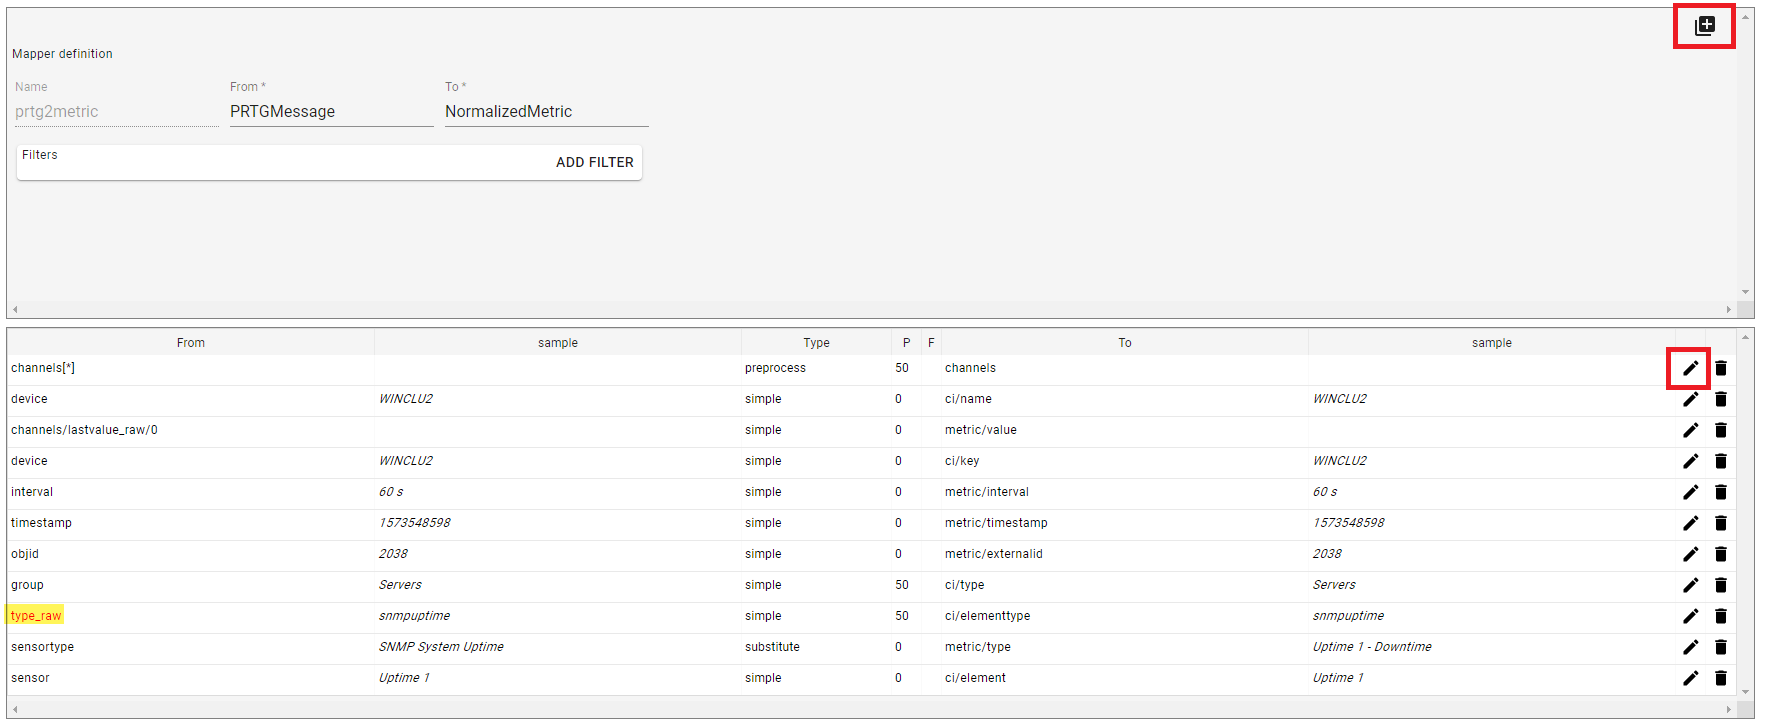
Mapper definition section
In the Mapper definition section you can either edit existing mappings or add new ones.
Precedence
The concept of precedence makes it possible to set an priority of a mapping definition. All mappings have a default precedence of 50. The lower the number the higher the priority. Example:
To set severity in target message you have defined two mapping definitions:
- from eventseverity to ci/severity => precedence 50
- from severity to ci/severity => precedence 40
Input messages can include
- eventseverity only
- severity only
- both, eventseverity and severity
In case of an input message including both fields the severity field would become ci/severity field in the target message because of the lower precedence in the mapping definition.
1Gateway does not check if a precedence configured is set on any other mapping definition. In case of the same precedence definitions are prioritized randomly.
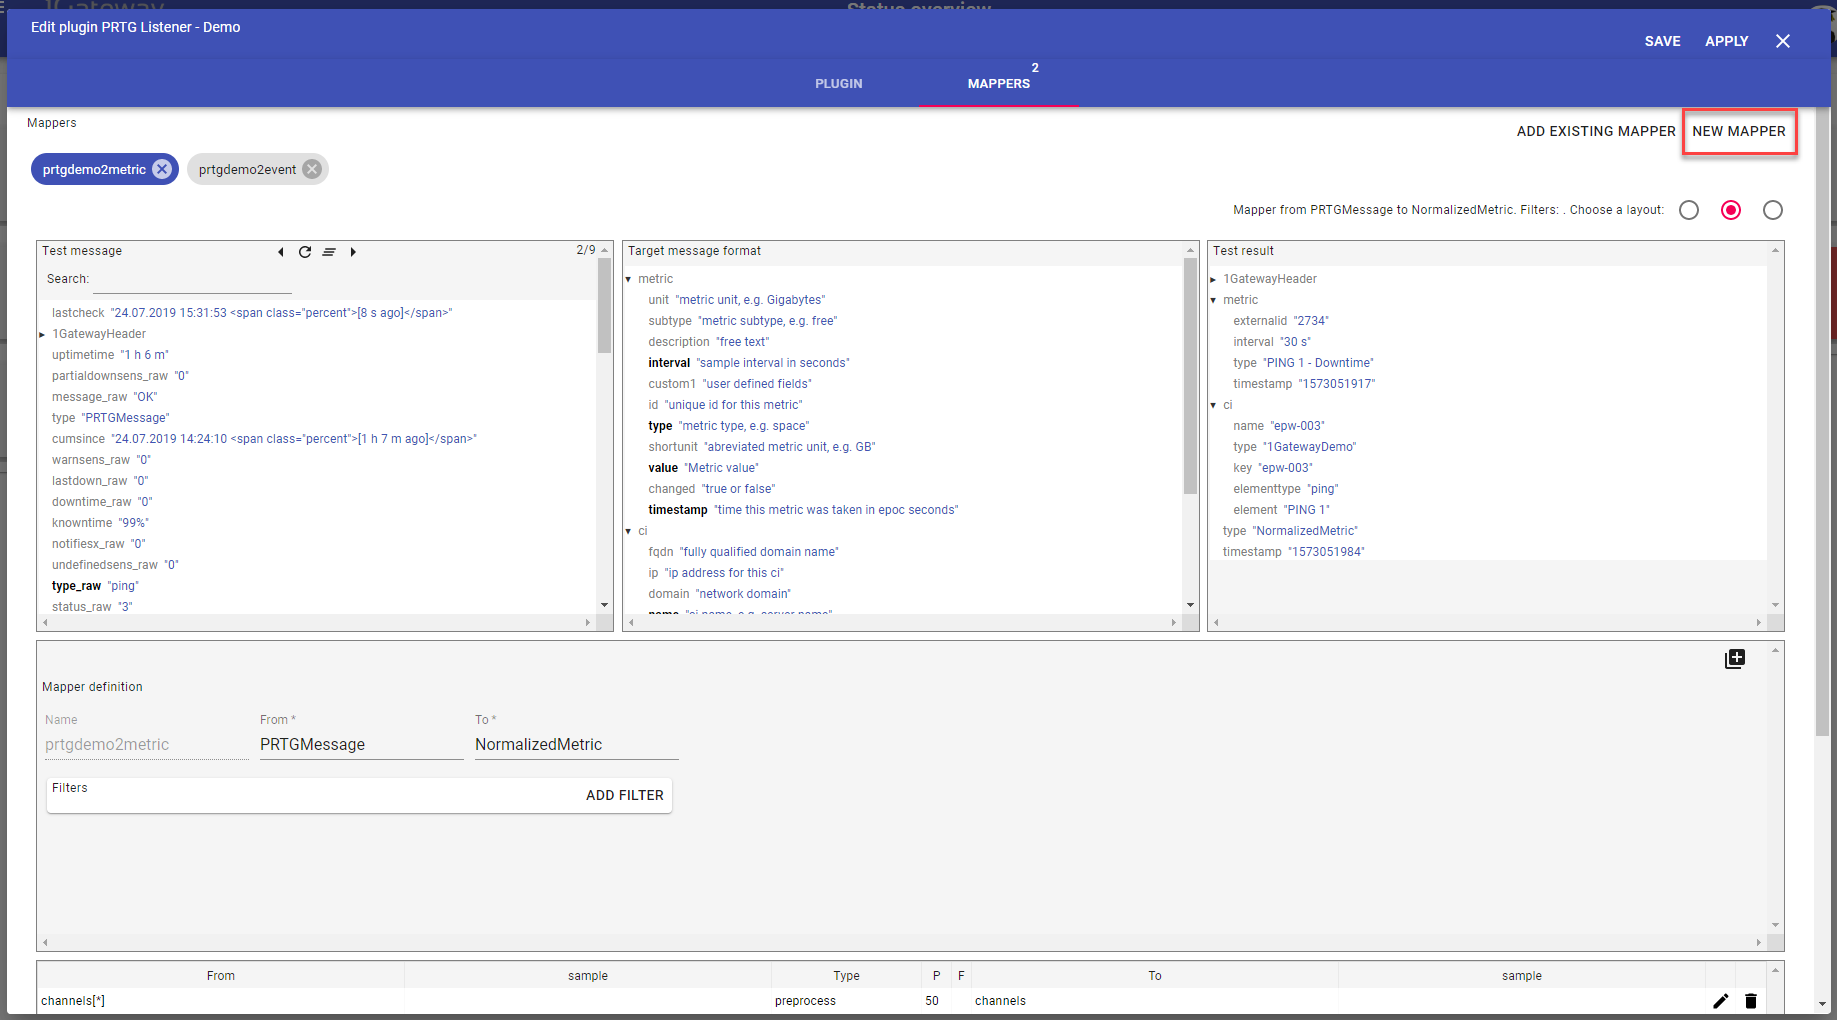
Configure Mappers
Add mapper from scratch
- On the Plugin card click on the menu and choose the option "Edit"
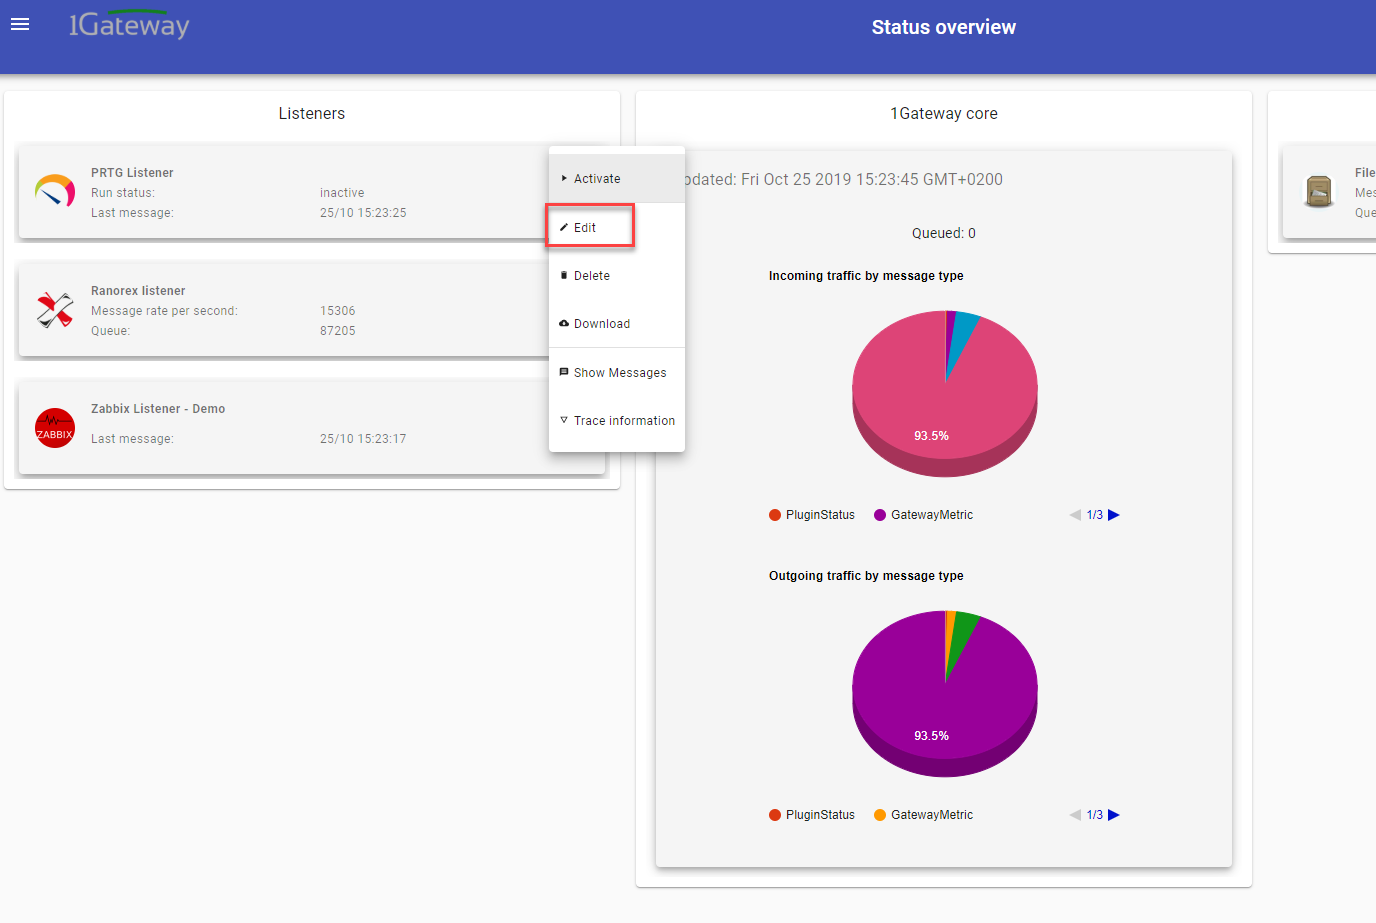
- Click on "Mappers"
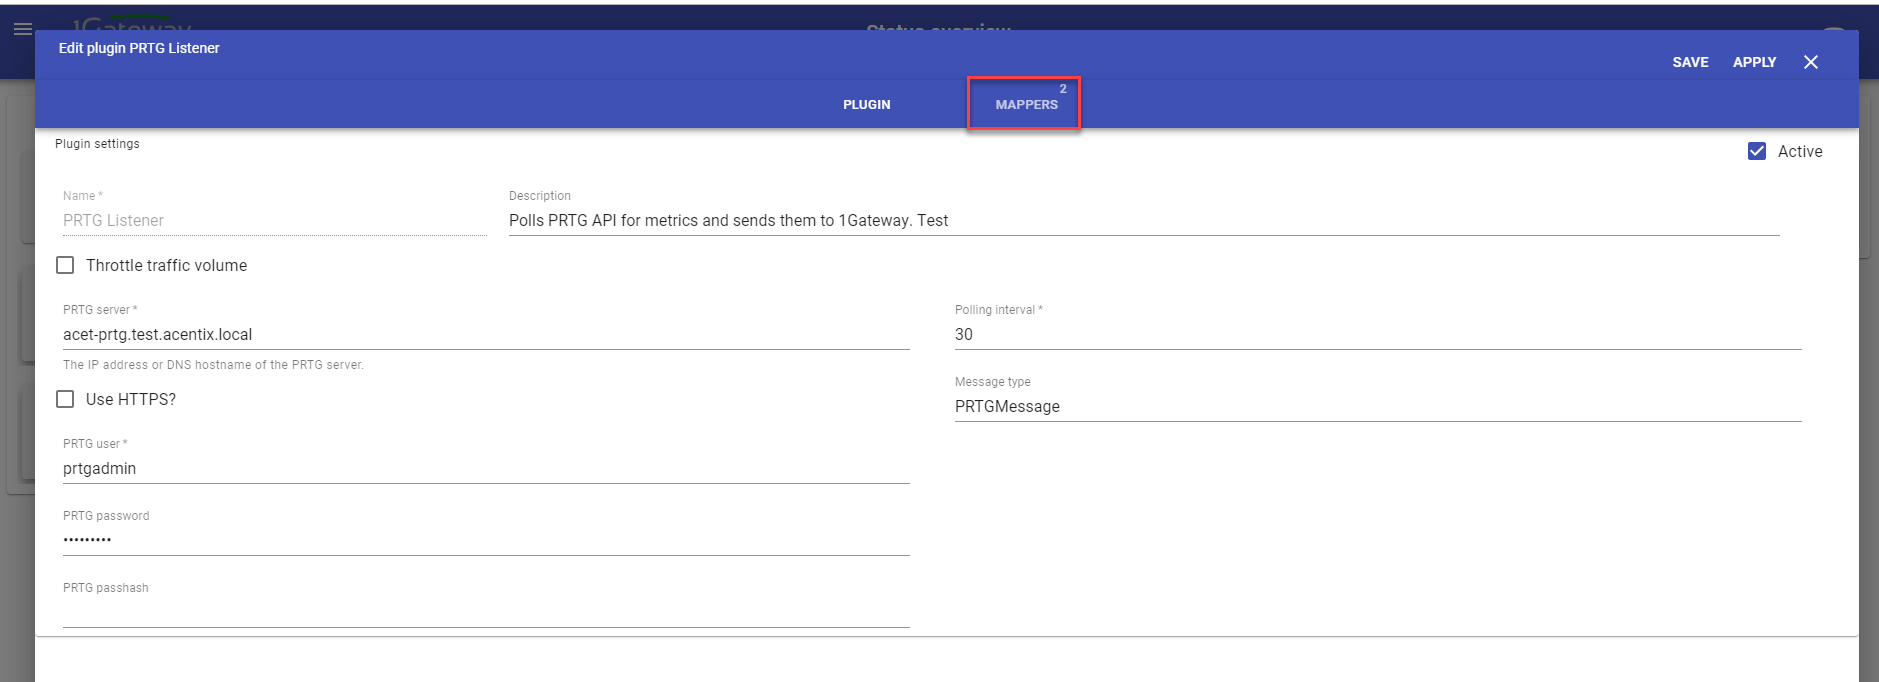
- Click on "New Mapper"
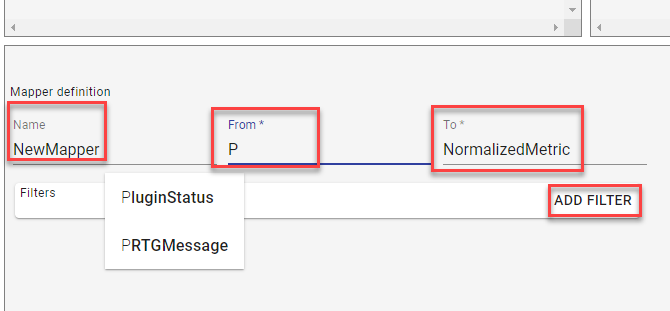
Give the new mapper a name and define input message format and output message format. Applying filters is possible to select specific messages within the Source message format.

Start typing brings up suggestions of existing Message formats. If you don't choose an existing format you create a new message format.
- Clear Messages in the Test Message row and fetch messages again. And choose a message to define mapper definitions.
- Mappers are saved automatically while configuring it.
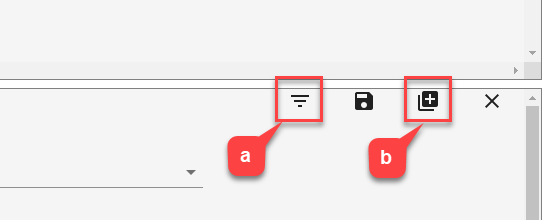
- Add a mapping by clicking on the add mapping icon.

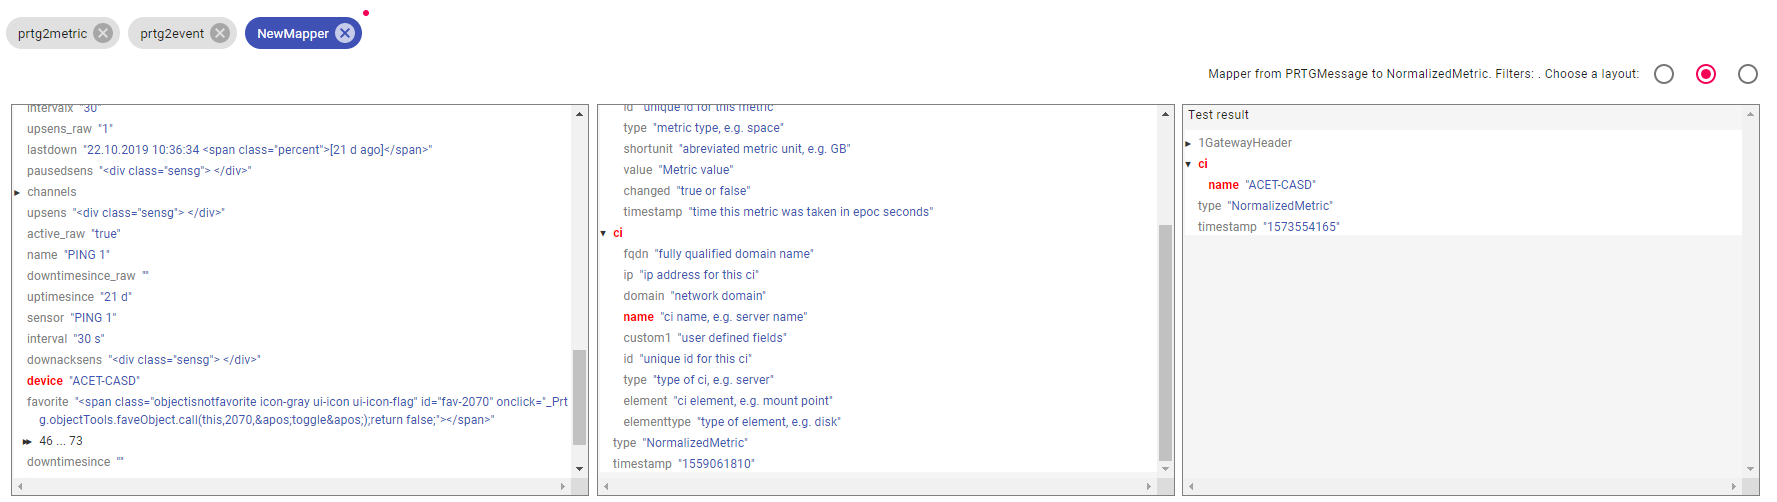
By clicking on a field in the Test message row the field gets chosen as the from field. In the Target message format row choose the destination field the from field should belong to. Define Precedence and mapper type.

You can create custom fields by simply type in a custom name in the To option.

For each mapping you can define the following options:
- Assign filter
- Add a submapping
In the Test result row you can now see the result of the defined mapping.
If the UI of the Result message doesn't refresh switch between messages in the Test message row
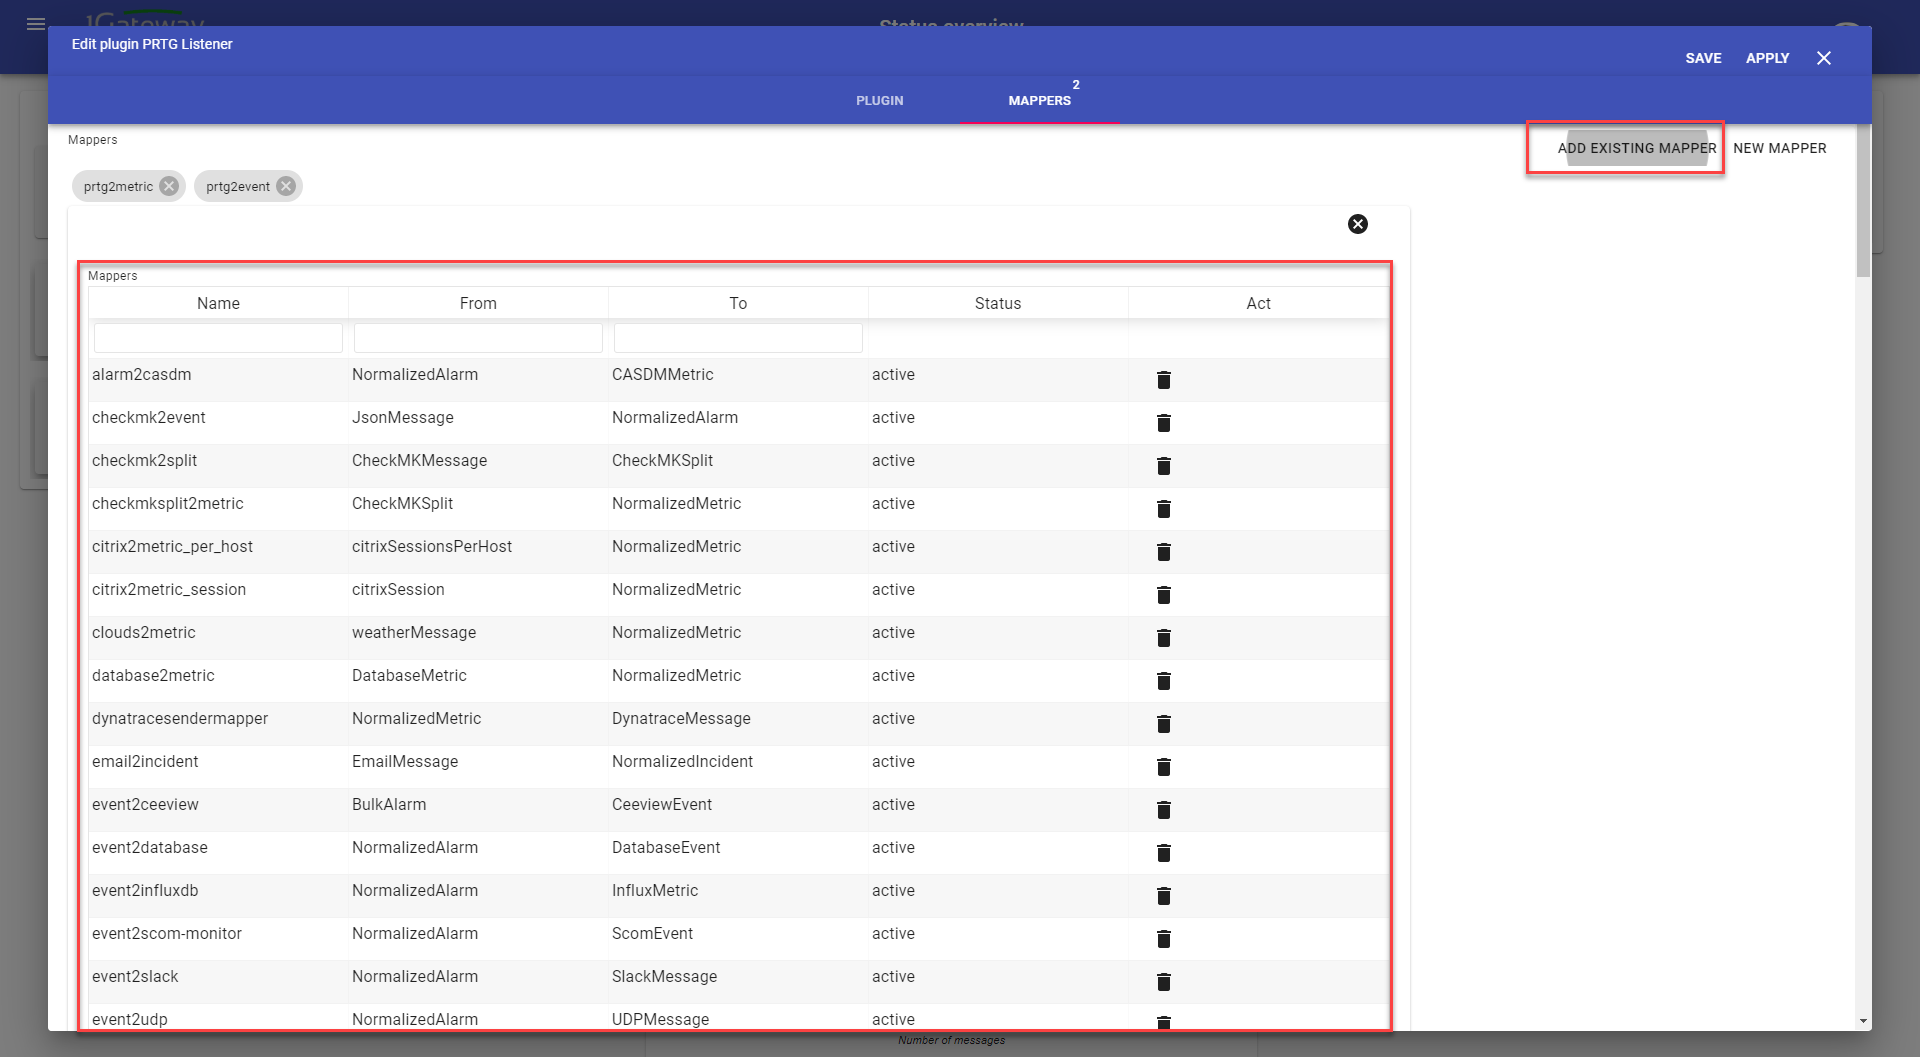
Add existing Mapper
- On the Plugin card click on the menu and choose the option "Edit"
- Click on "Mappers"
- Choose the option "Add existing mapper" and select the mapper in the list of the available mappers below.
Modify existing mapper
- On the Plugin card click on the menu and choose the option "Edit"
- Click on "Mappers"
- Click on the mapper you want to modify and start change mapper parameters
- Start modify the mapper
Add a mapping
To add a new mapping, click on the plus icon in the mapper or double click on a field in the Test Message.
To edit an existing mapping click on the pencil icon in a mapping row.
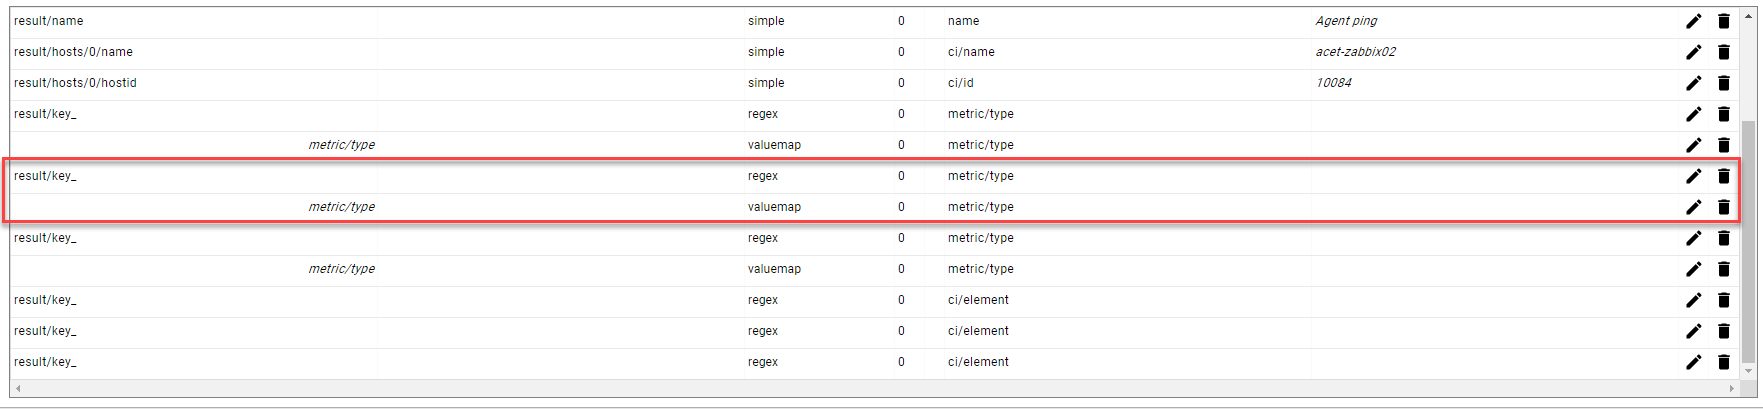
Submapping
To add a submapping to an existing mapping, edit a mapping and click on the plus icon in the mapping edition pane.
If more than one functionality is required from a mapping, Submappings need to be added.
In the example there is a mapping that applies a regular expression and then applies a lookup table mapping to the result. Submappings are indicated by indented From field.


Mapper Details
Manage Mapper configurations
Mapper configuration are stored centralized. You can manage mapper configurations in the System maintenance menu.
You need to be in the advanced user mode to manage mappers
Click on the Menu Icon and choose the option "System maintenance".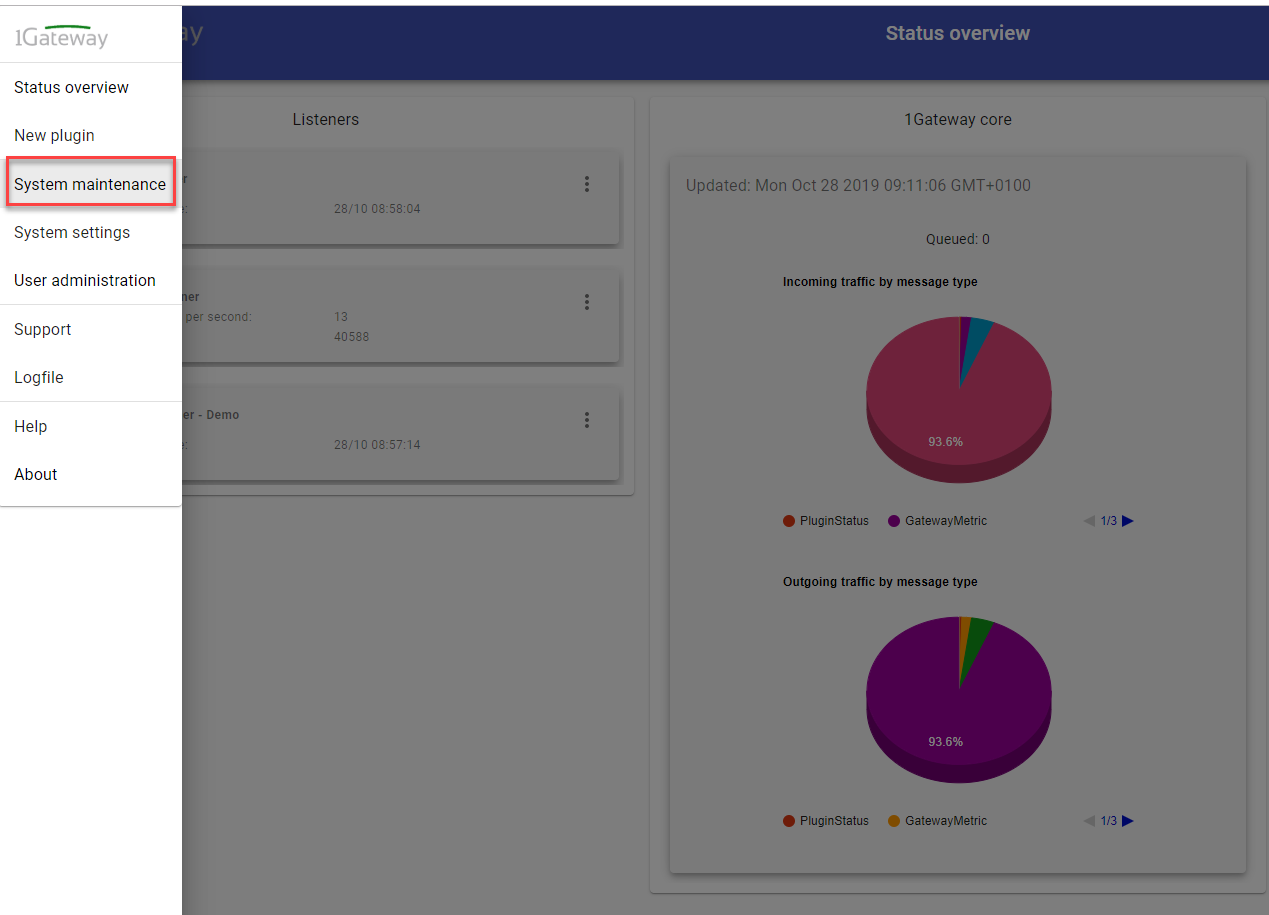
If there is a mapper in both production and draft mode it means that the last made changes are not in production yet.
Available actions:
- Download mapper configuration file in JSON
- Delete a user defined mapper configuration
- Copy mapper configuration from production to draft
- Put a draft mapper in production
