Plugins
The plugins that are connected to 1Gateway define the integrations of the different monitoring products. There are two types of plugins:
- listeners
- senders
Listeners are the inbound plugins, passing messages into 1Gateway. Senders are outbound and pass messages from 1Gateway to other systems.
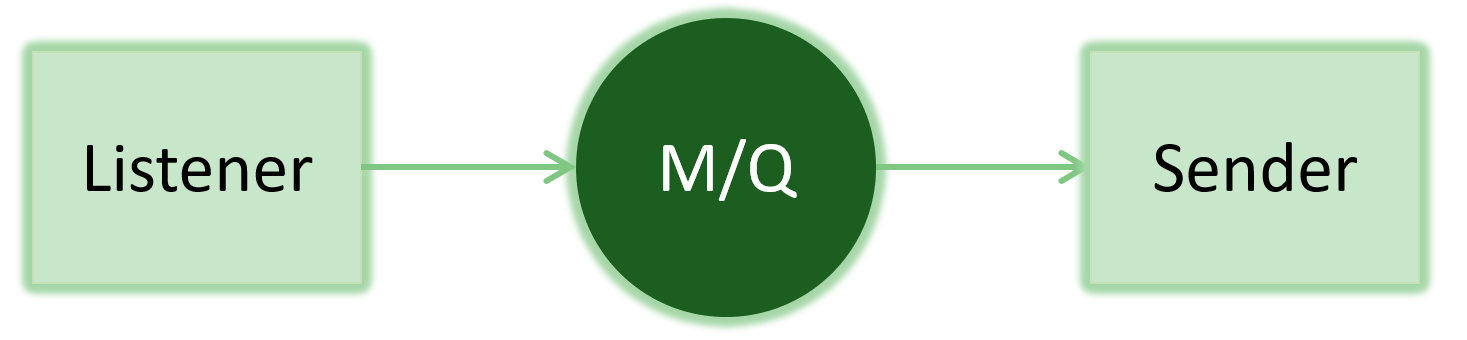
Image 1. Definition of plugin types
Installation
Make sure you have the 1gateway zip file that includes the plugin files and valid licences information ready. This file has been provided to you with the installation files.
1 - Login
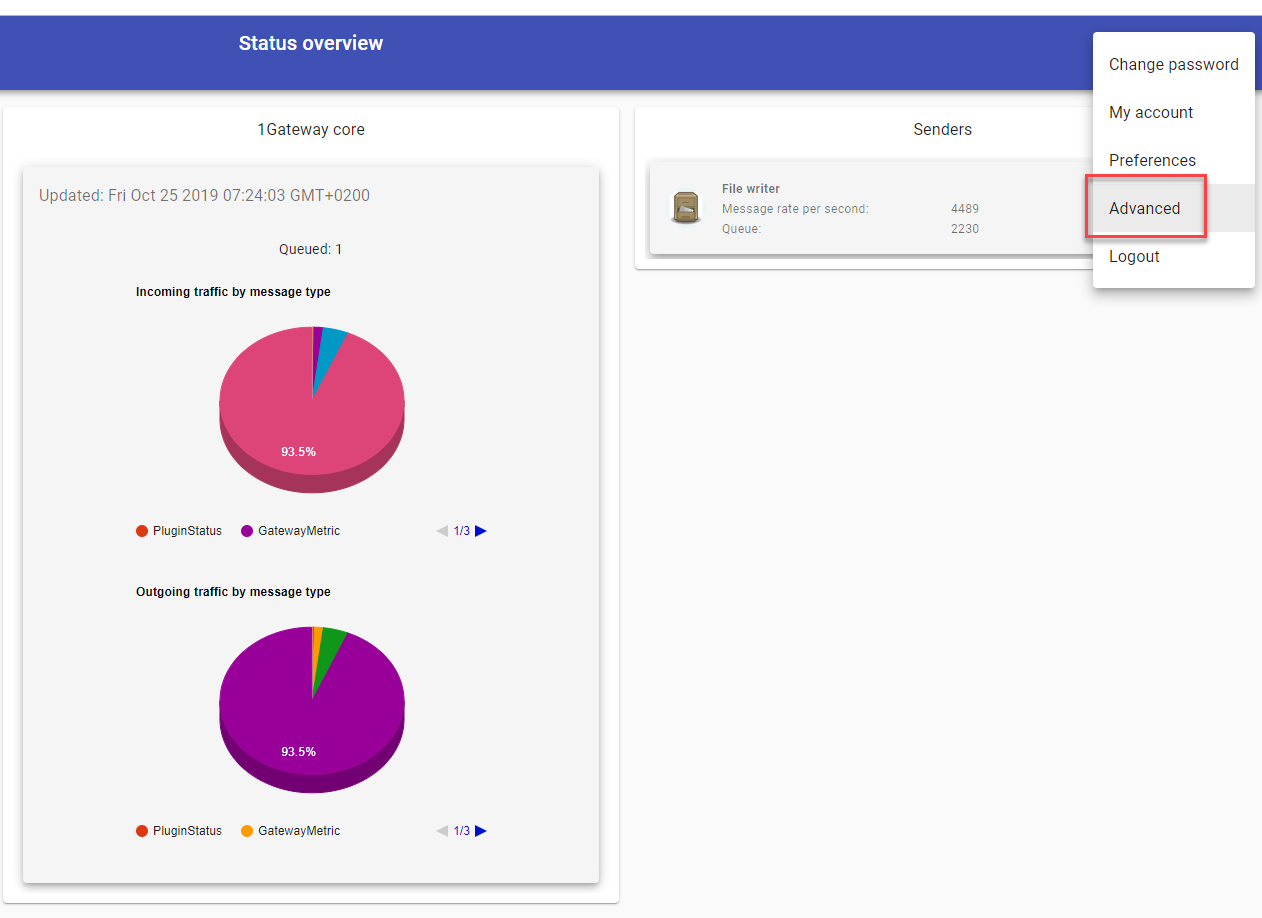
Login to 1gateway, and make sure you are in "Advanced mode". If this is the first time you log in, the default user and password are both 'admin' (without the quotes).
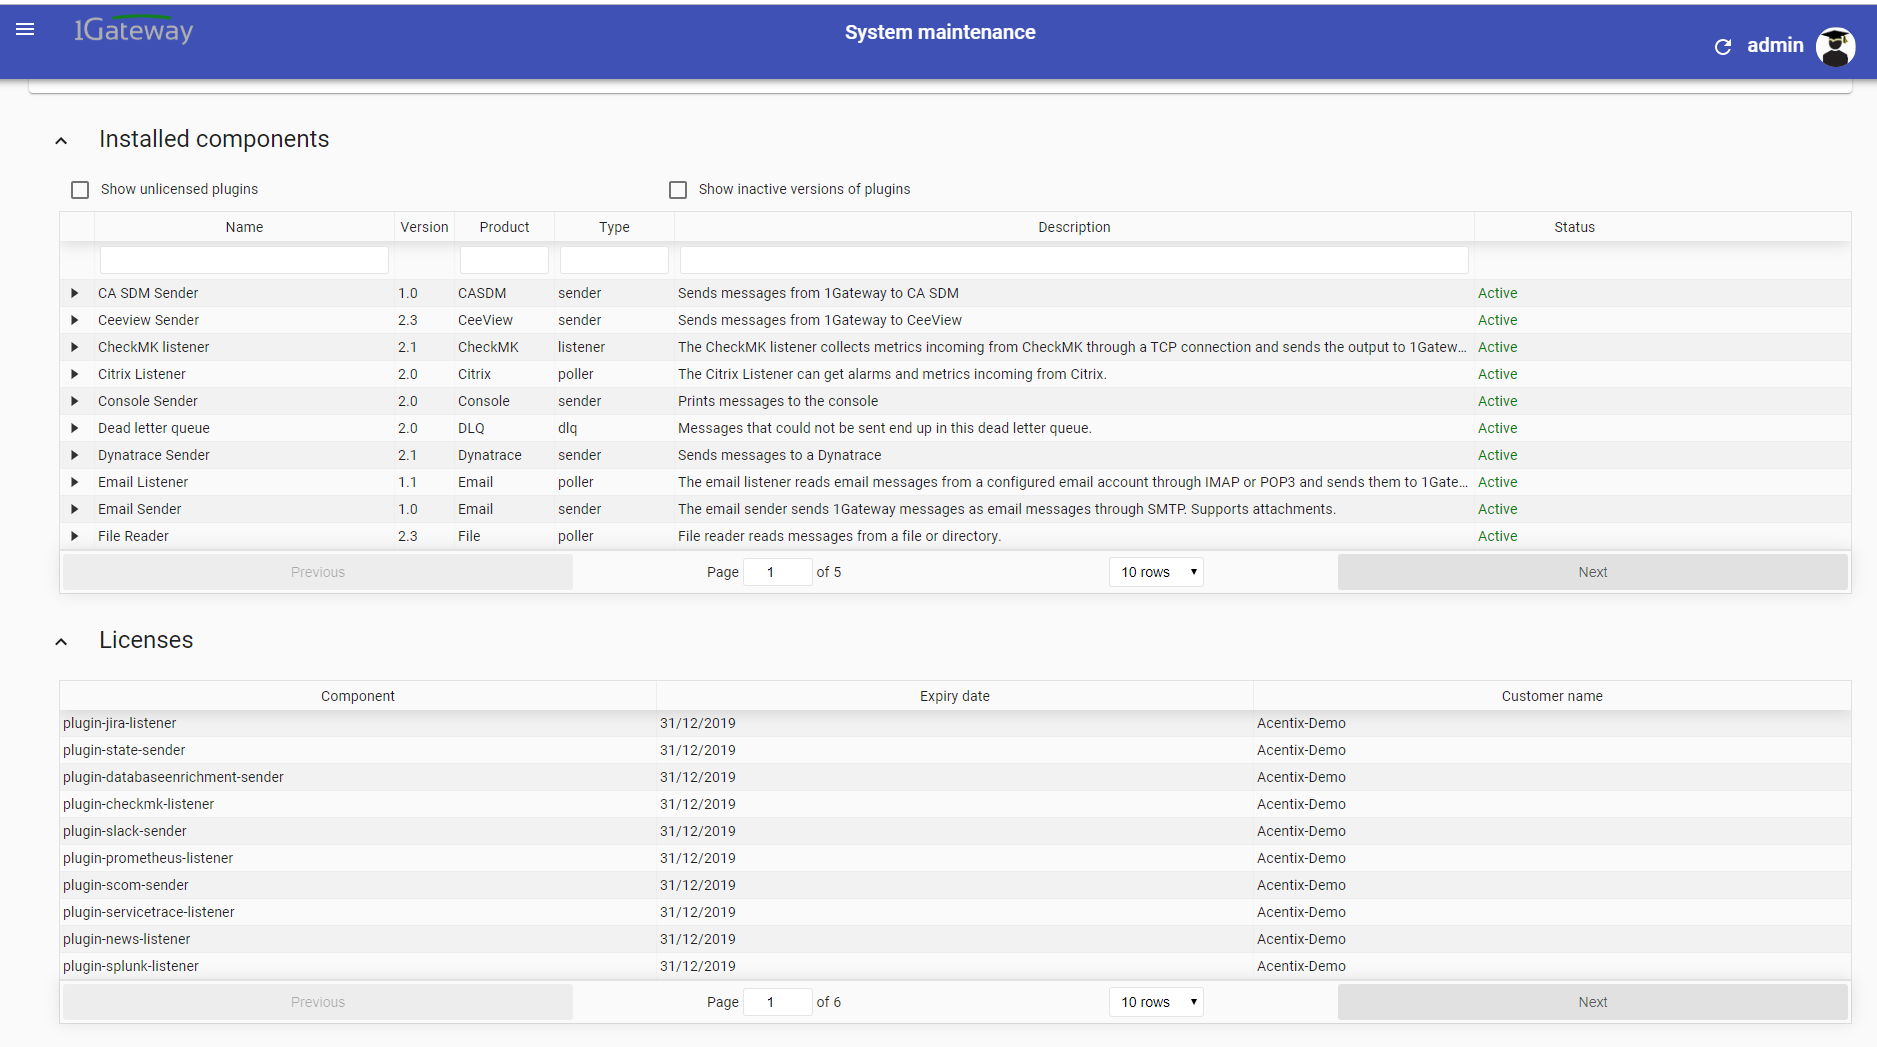
2 - System Maintenance
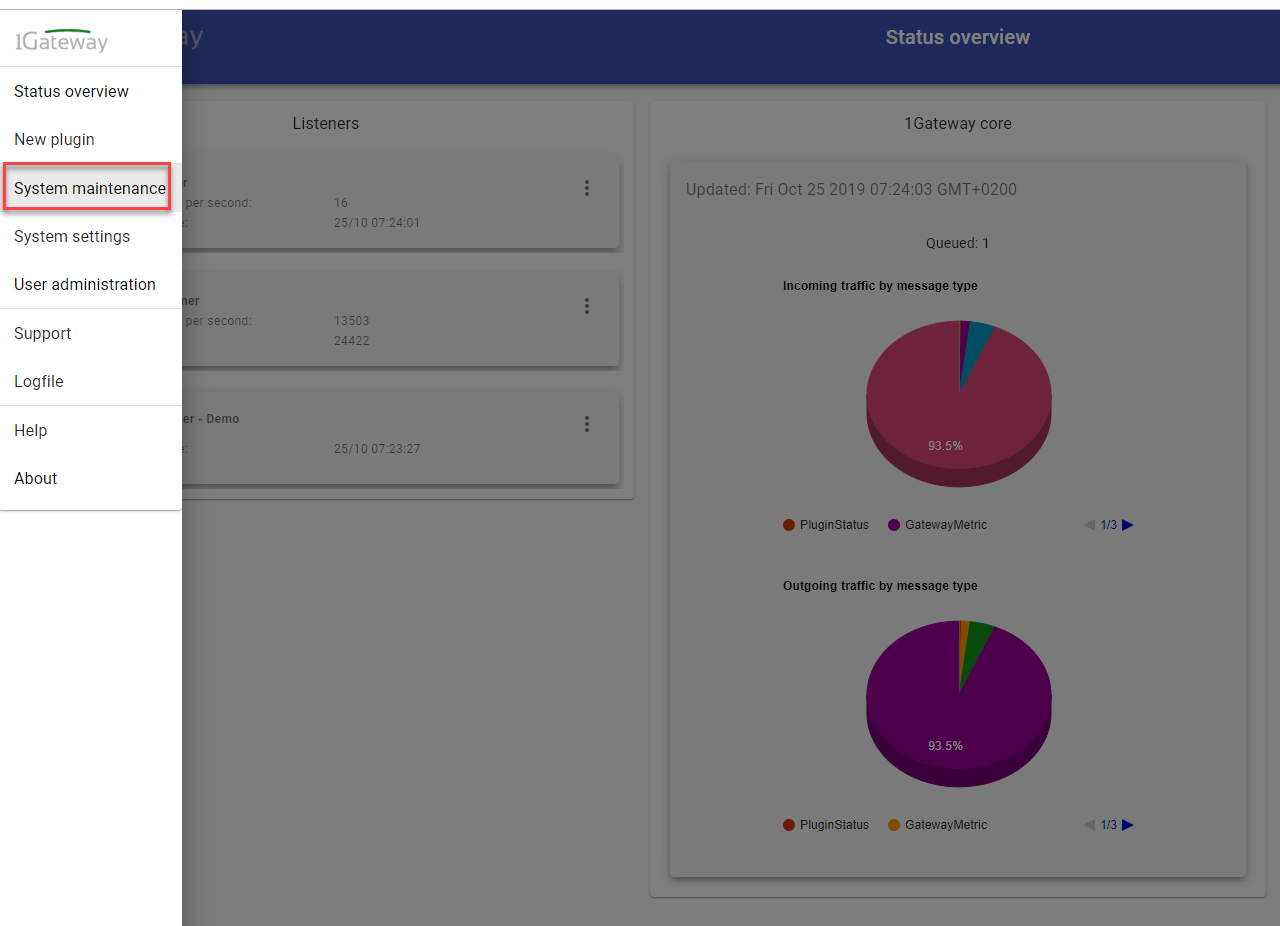
Click on the menu icon and choose the option "System maintenance"
3 - Upload file
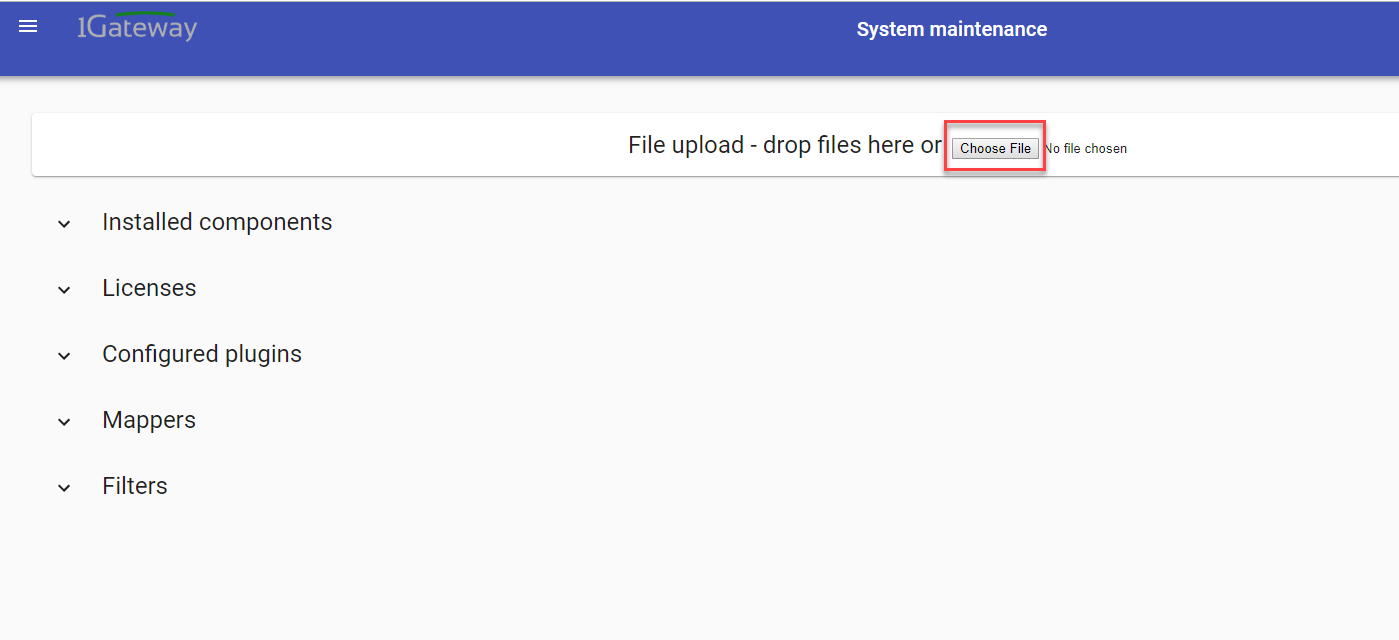
In the System maintenance view you can either drag and drop the downloaded zip file or select it by clicking the "choose file" button.
4 - Restart
After the upload installation will be confirmed. Restart 1Gateway to ensure any locked files are updated.
Configuration
Plugin configuration and other options are accessible through the menu on the plugin card on the status overview page.


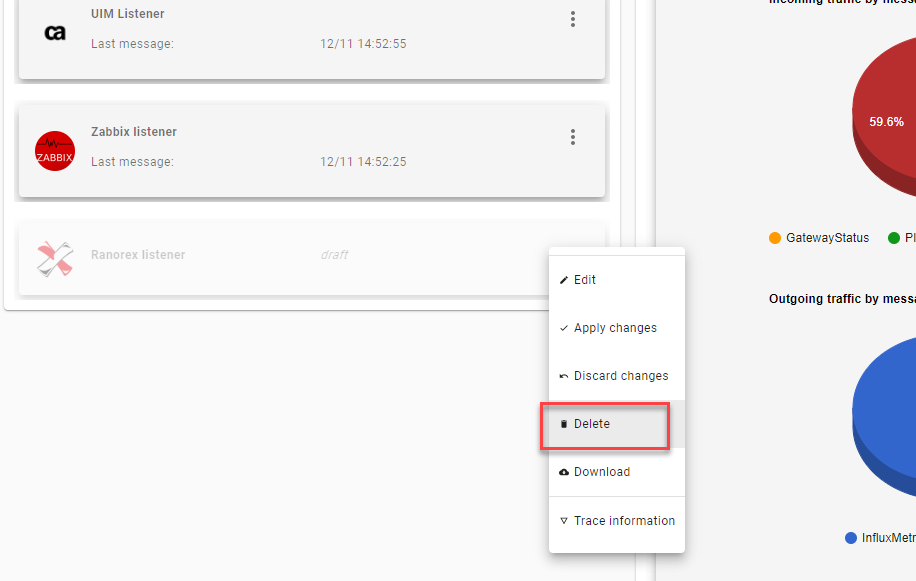
Image 1. Actions to take on a plugin in production (left) and on a draft plugin (right)
For plugins in production, the actions that can be taken are:
- Activate: start collecting / sending data to the endpoint
- Deactivate: stop collecting / sending data to the endpoint
- Edit: edit plugin configuration
- Delete: put the plugin in draft mode
- Download: download the plugin configuration
- Show messages: show the messages that have been collected form the endpoint or sent to the endpoint
- Trace information: used for debugging
For draft plugins, the actions that can be taken are:
- Edit
- Apply changes: put the plugin in production
- Discard changes: undo the last edit
- Delete
- Download
- Trace information
Add New Plugin
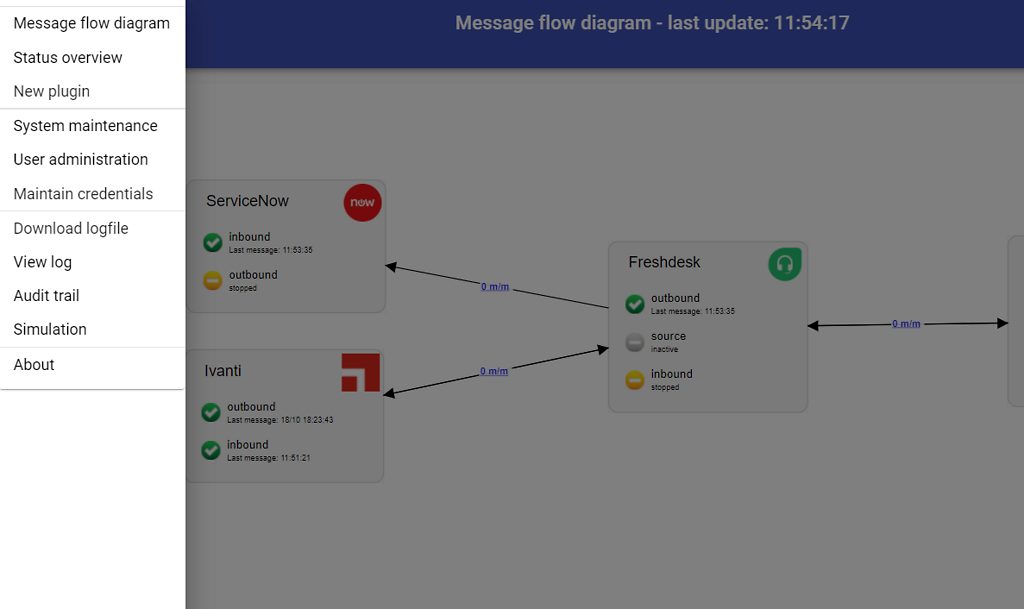
Open the main menu and click on "New plugin"

Select the plugin you want to configure. Use the Filter field if needed.
Continue with the configuration as described here.
Activate / Deactivate
Click deactivate to stop the plugin. While a plugin is deactivated it does not collect data from an endpoint and does not send data to an endpoint.
When a plugin is deactivated, click Activate to start collecting / sending data again.

Edit
Basic and advanced users have different generic configuration fields to modify. For Plugin specific configuration options please refer to the plugin list.
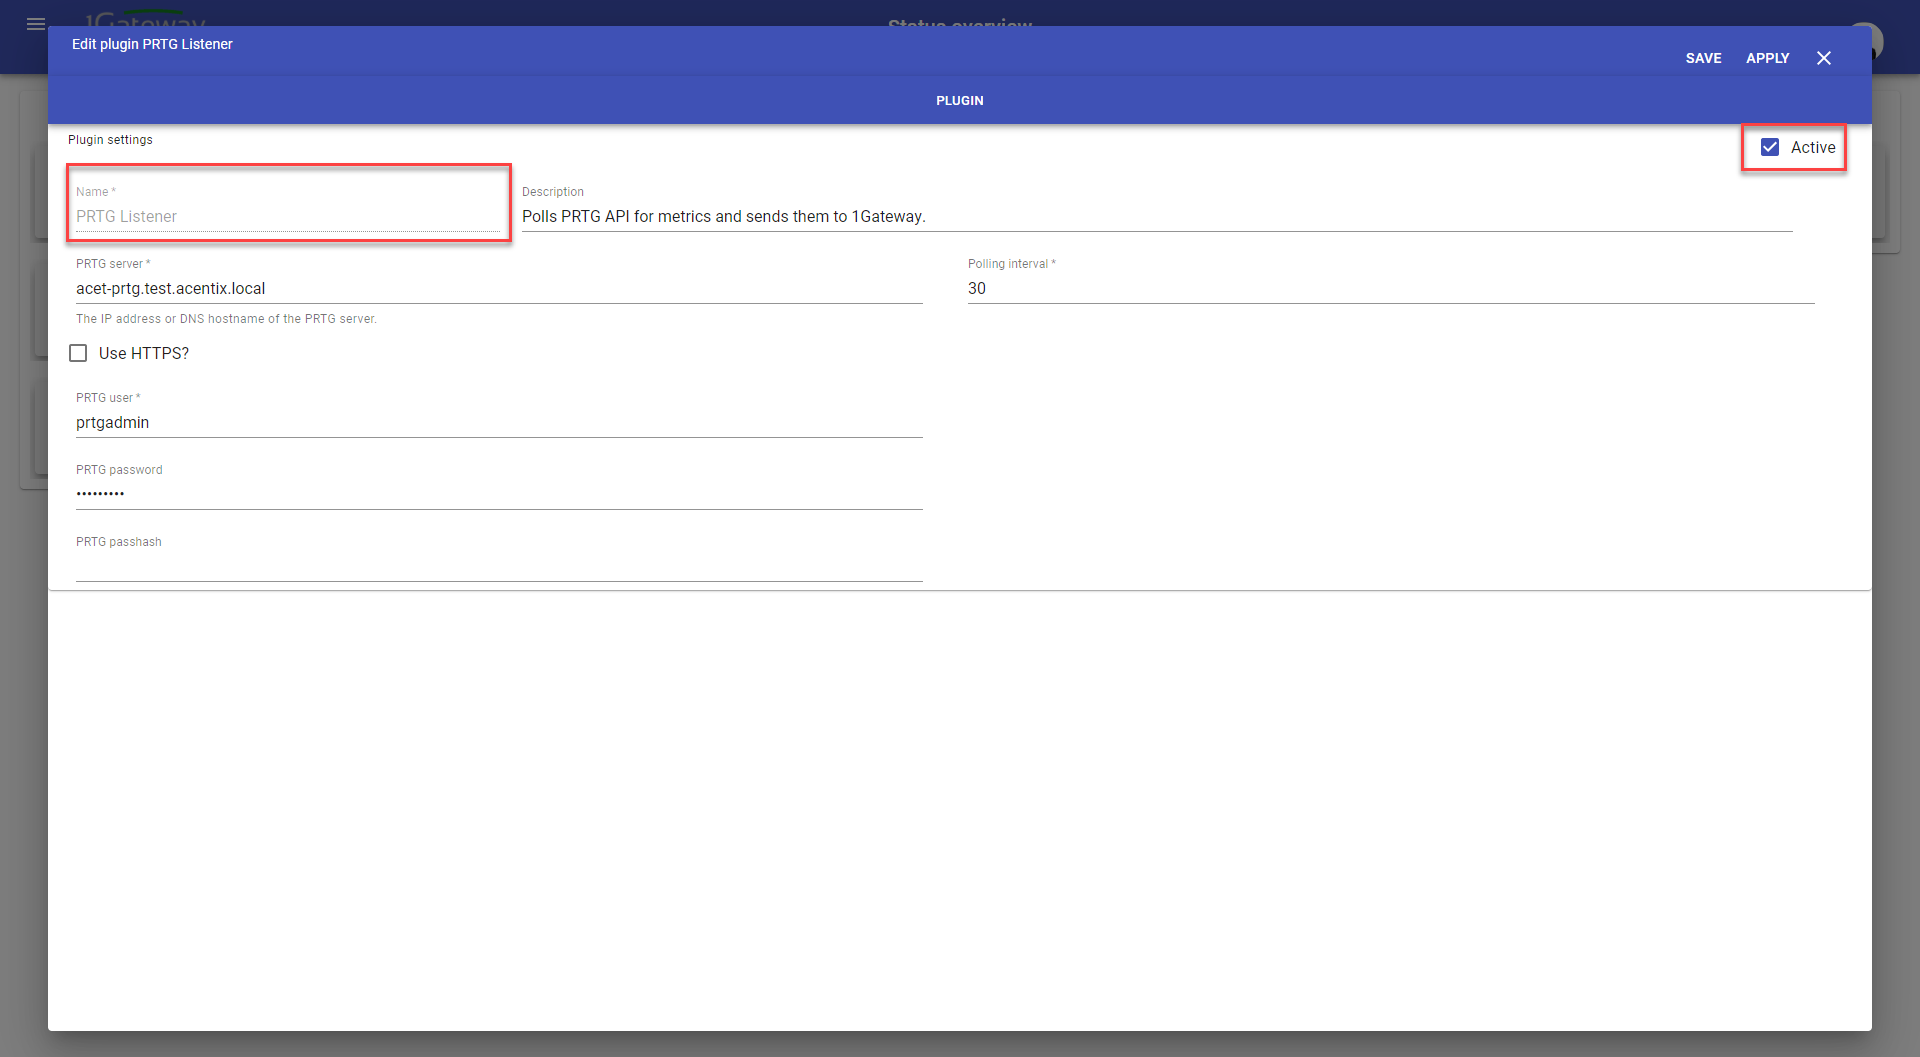
Basic User Mode
- Name: plugin name, must be unique.
- Active: indicates if the plugin is active or not.
Advanced User Mode
An advanced user can configure traffic and load information for every plugin.
| Parameter | Plugin type | Value | |||
|---|---|---|---|---|---|
| Save queue on disk | Sender | true/false | |||
| It defines if the message queue of a plugin should be persisted on disk. If it’s set to true the messages will be persisted to disk, preventing message loss. If it is set to false, the messages will not be persisted to disk. In this case, if there is an error (1Gateway fails to connect to an endpoint, for example), messages will be lost. The default value of the PersistQueue parameter is false. During graceful shutdown, queues are drained or saved to disk (depending on this parameter). | |||||
| Maximum queue size | Sender | Numeric | |||
| Defines the maximum size of the queue in number of messages. The default maximum size is 1000000 messages. When a sender queue is full (reached the MaxQueueSize), messages are discarded. | |||||
| Throttle traffic volume | Sender / Listener | true/false | |||
| Allow throttling when plugin can’t keep up. For more information click here. | |||||
| Discard messages when queue is full | Sender | true/false | |||
| Discard messages when queue reaches the maximum queue size. For more information click here. | |||||
| Debug logging | Sender / Listener | true/false | |||
| Shows more information in the log for that plugin. | |||||
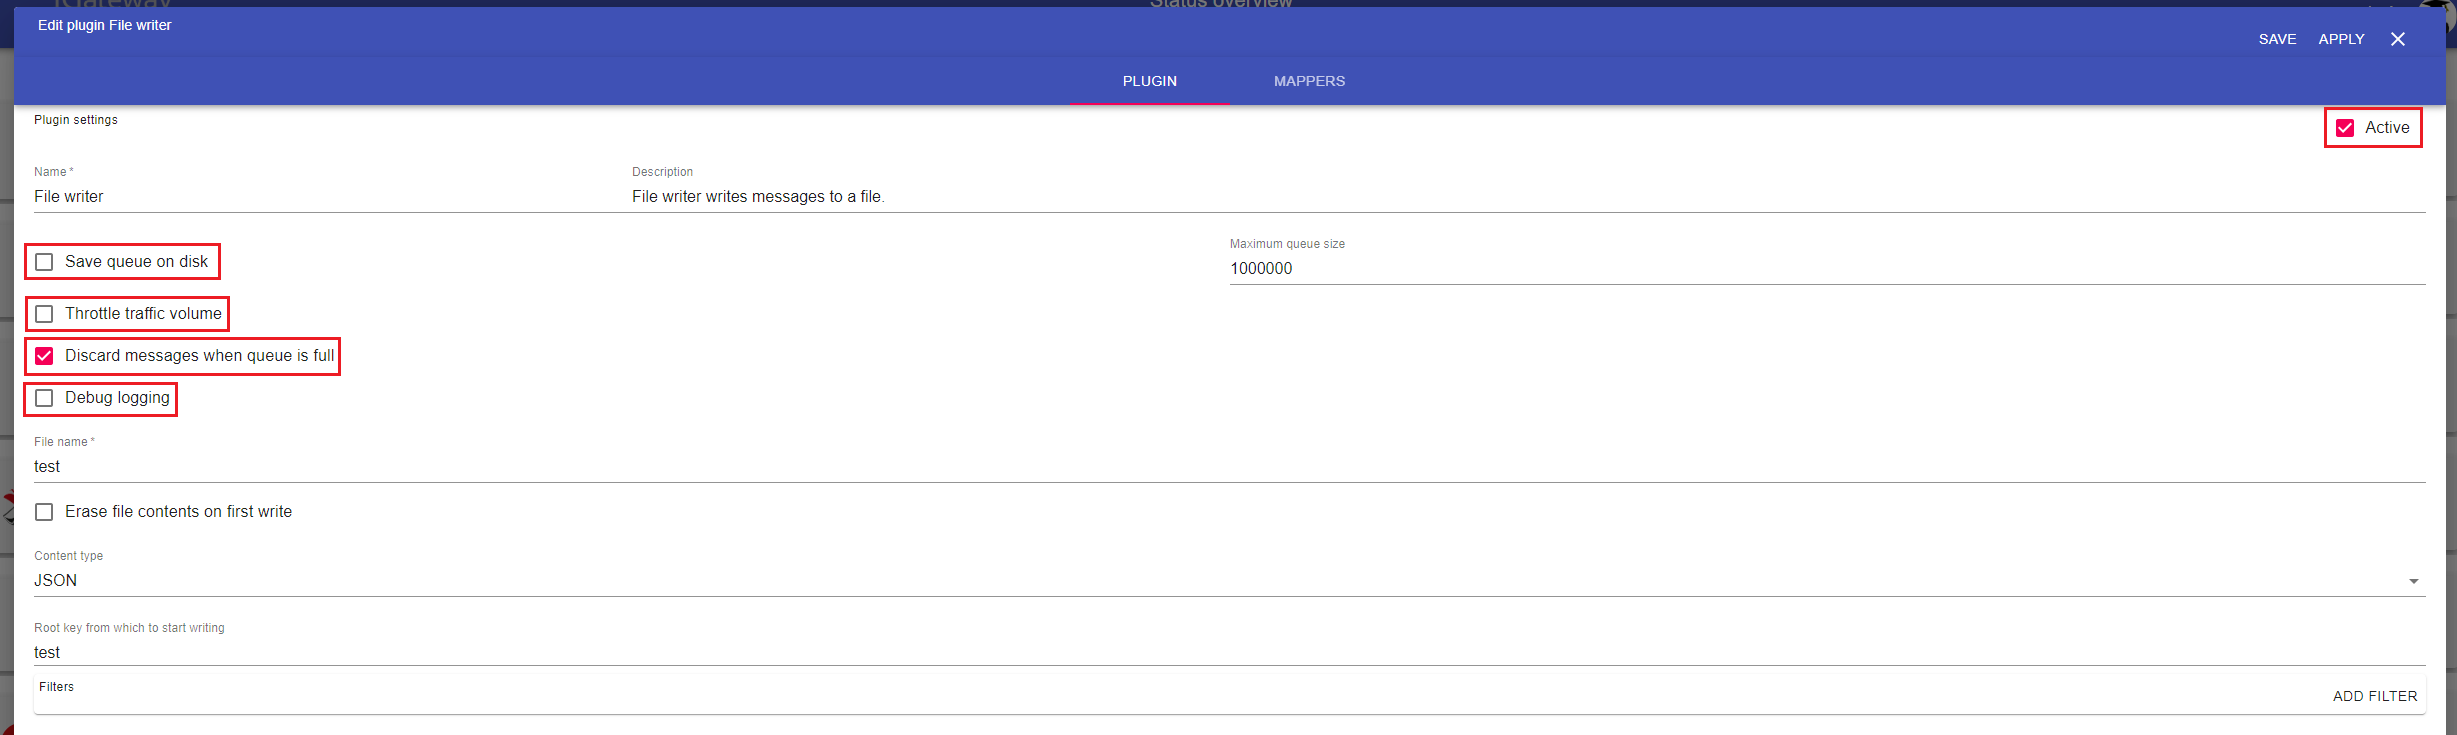
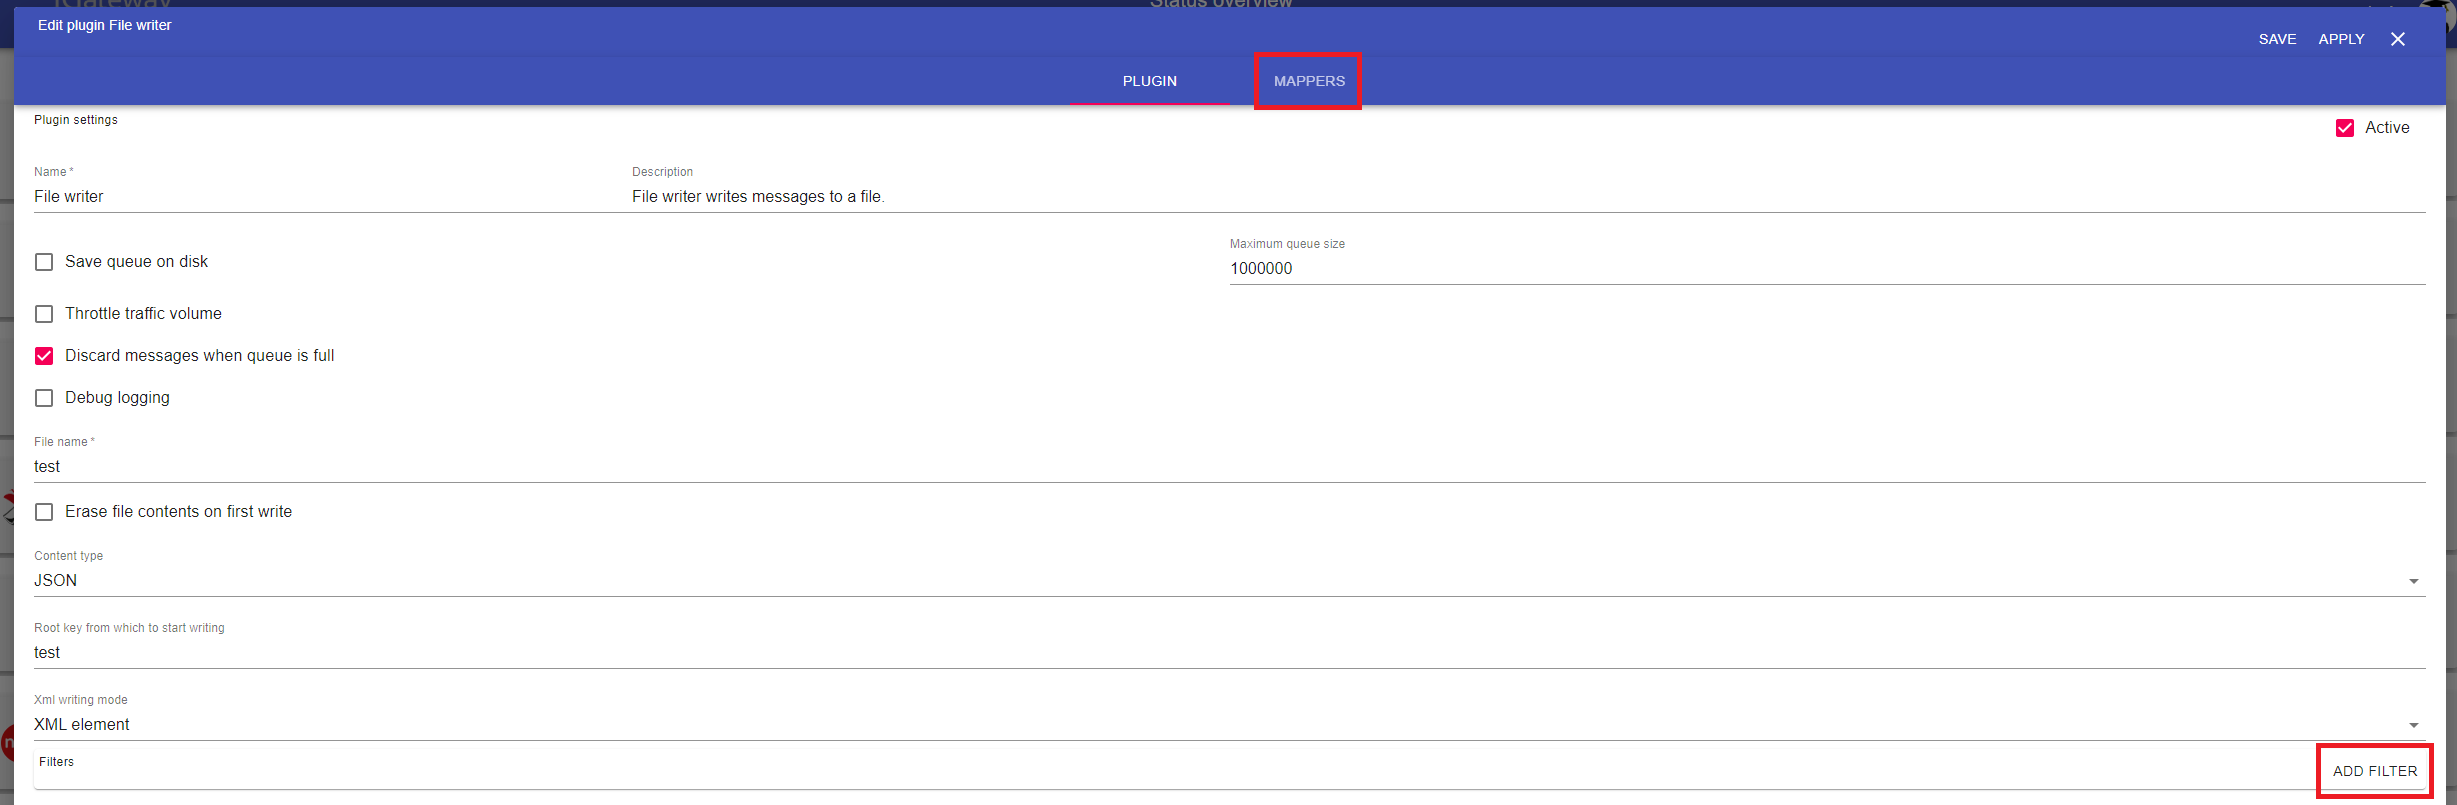
In addition, when in advanced mode you can add new mappers and filters or edit existing ones.
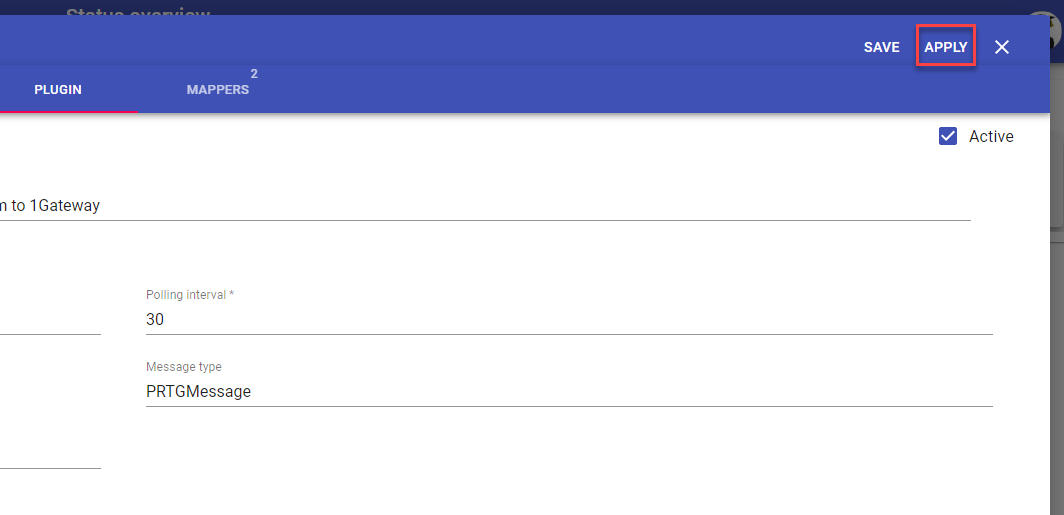
Apply changes
A configured plugin is only put into production when applying changes.
The save button saves a draft version of the plugin.
Changes that are not applied yet are indicated by a hint saying "modified" on the plugin card. Furthermore in case of not applied changes the extended options "Apply changes" or "Discard changes" are available in the plugin menu.
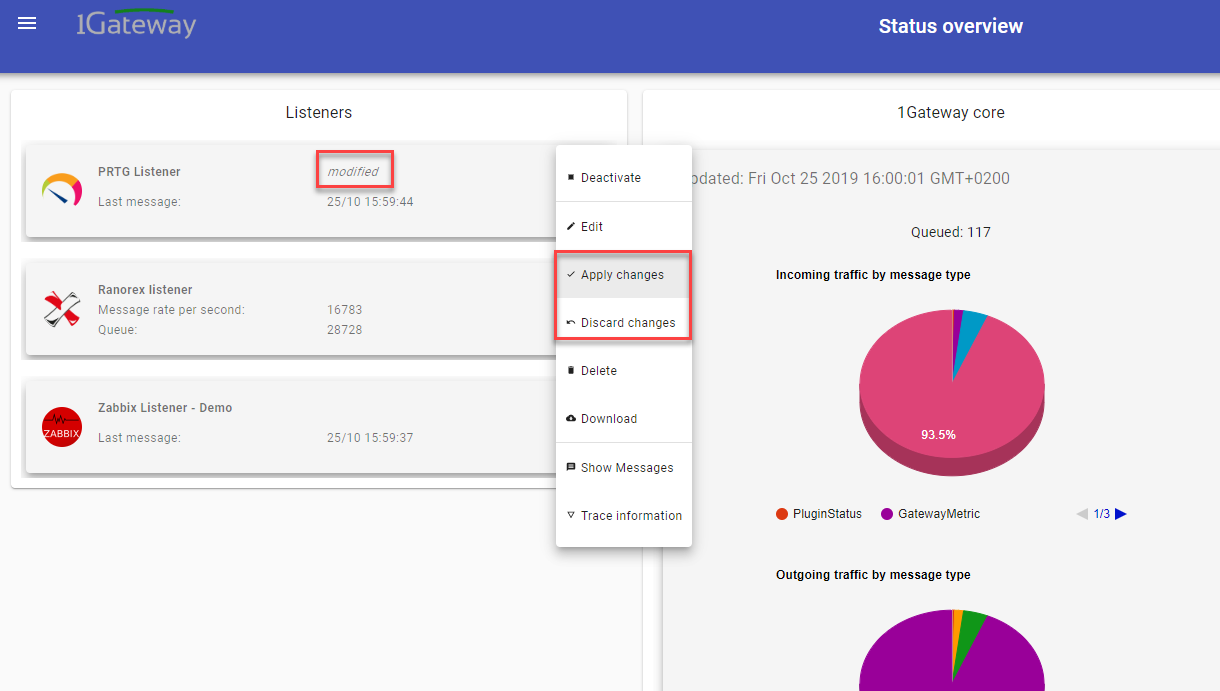
Apply changes / discard changes
A draft plugin can be put into production by clicking on "Apply changes". To undo the last changes done in the plugin configuration click on "Discard changes".
Delete
Deleting a plugin in production puts it in draft mode. To delete it permanently, delete the draft version as well.
Download
Click on "Download" to get the plugin configuration in JSON.
Show Messages
Click on "Show messages" to view the messages that pass through a specific plugin. In the case where the plugin has a configured mapper, some or all messages will be Composite Messages, that will include the evolution of the message. The message dialog has a filter that allows the user to filter messages by any field.
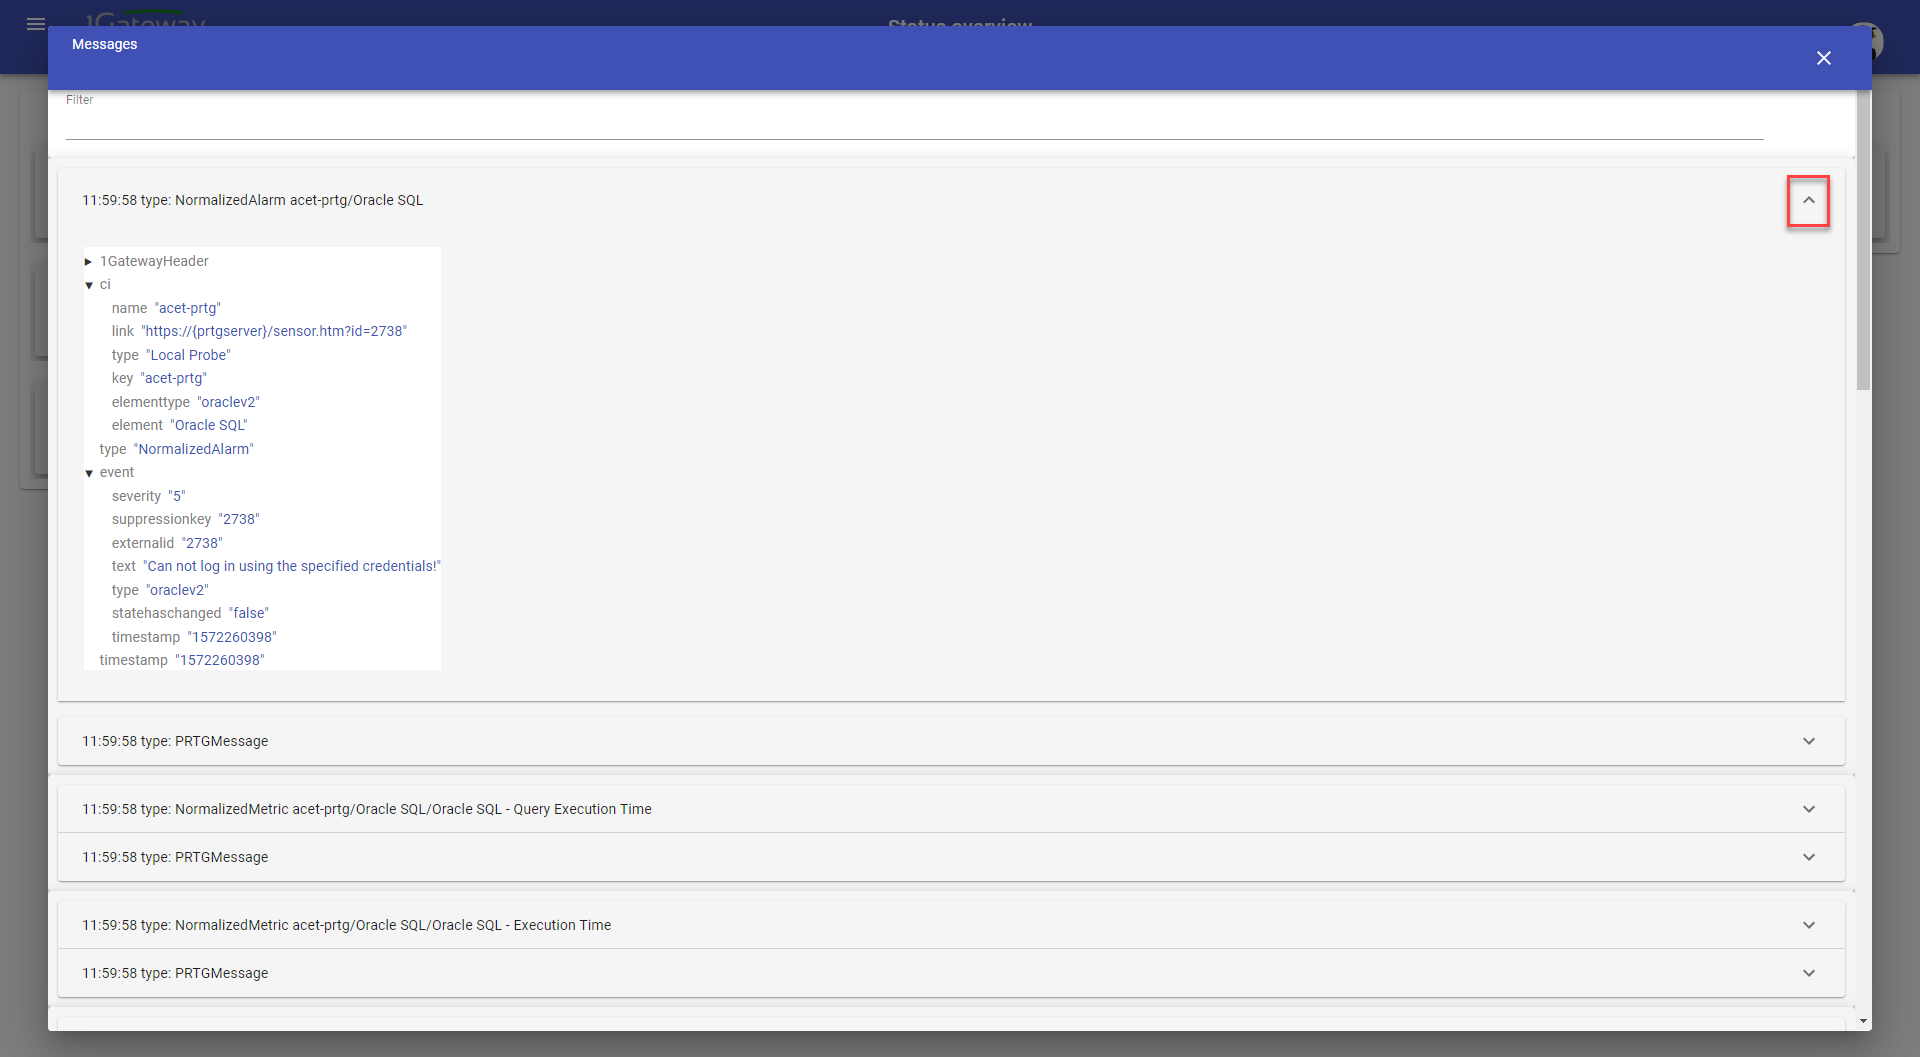
Click on the arrow to get details of each message.
Trace information
Trace information includes all information about the plugin-state. Trace information are helpful when debugging plugin errors.