Description

The Jira Sender plugin propagates state changes and inserts XRay Test Execution issues into Jira. It was designed to work with the Test Automation Sender plugin.

Prerequisites

Jira configuration

For the Jira - Test Automation integration to work optimally, a number of custom fields and workflow transitions are required in Jira. 


1. Create two custom field: ST TA Robot and Custom ST TA screen resolution for the testplan issue type (Jira Administration -> Issues -> Custom Fields)

ST TA Robot: select list (single choice). Here you should make a list from your Servicetrace robot names (not robot ID)

ST TA Screen resolution: select list (single choice). Here you should insert the screen resolution you use in Servicetrace Test Automation Workflows (for example: 1920x1080 or 1920x1200)

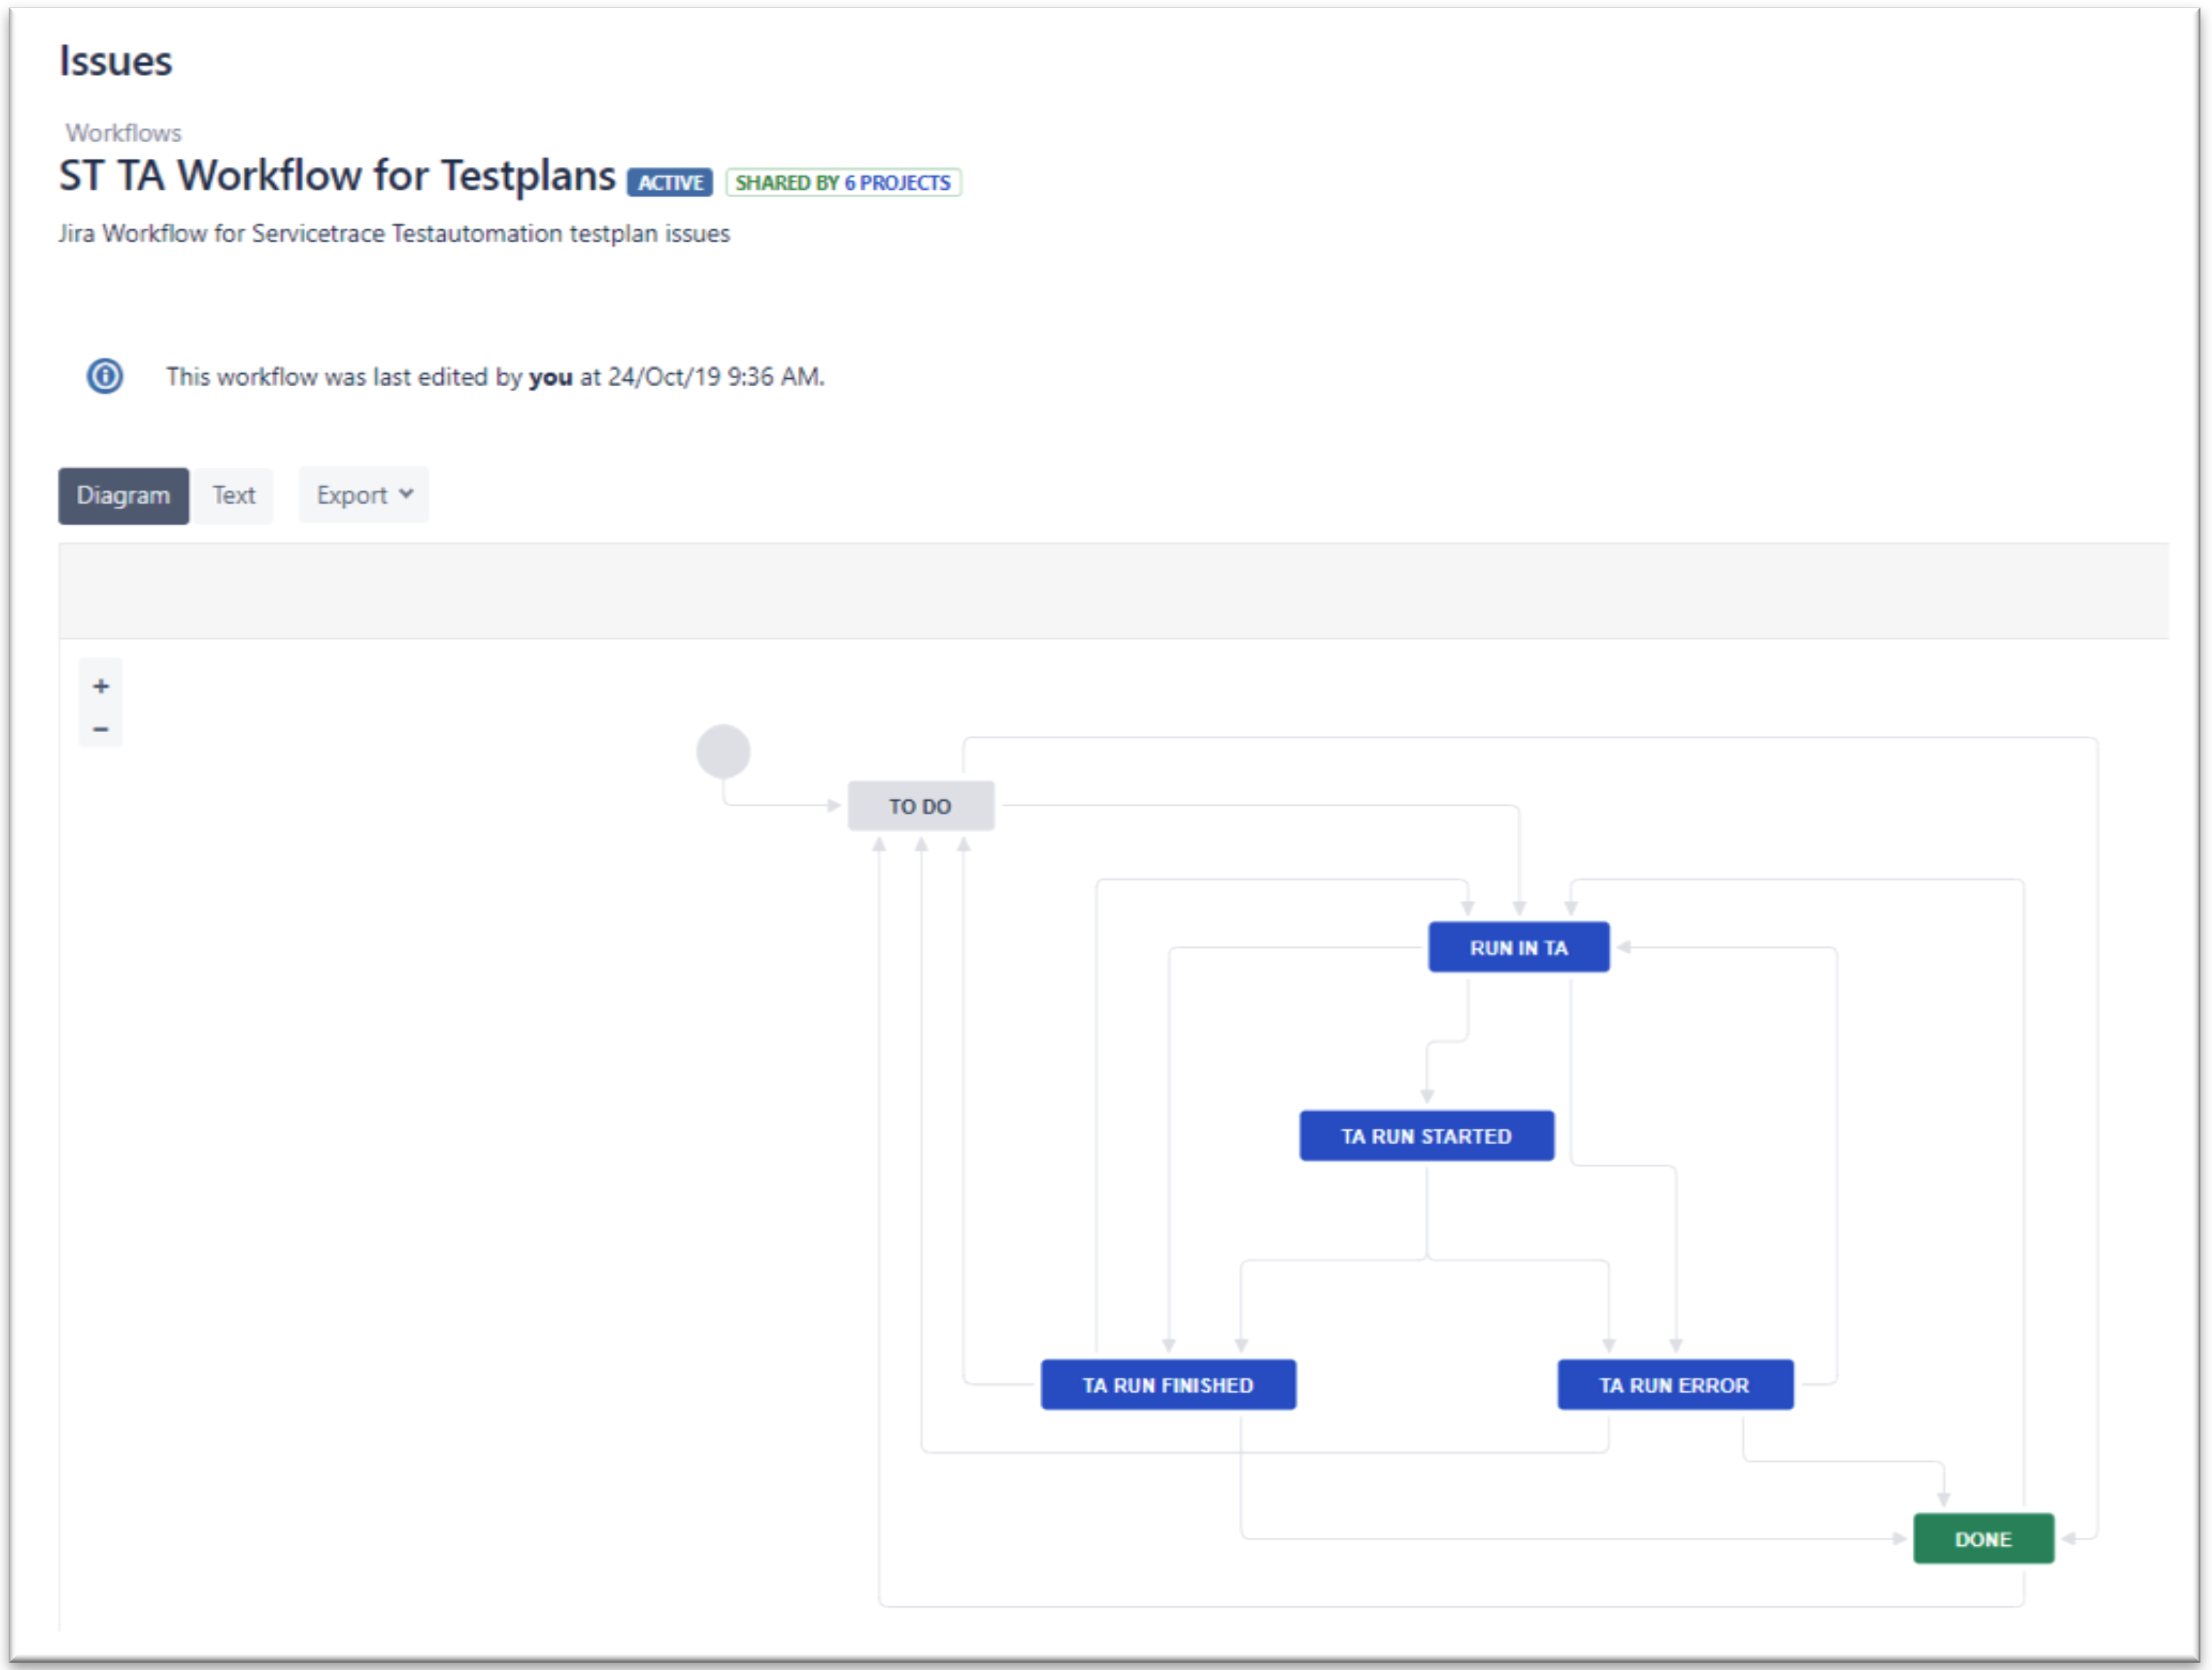
2. Import the ST TA Workflow in your system. (Jira Administration -> Issues -> Workflows)

  • Create your projects in Jira (classic project, not next-gen project)
  • Enable Xray for the projects (make sure you have the Xray issue types, at least Test, Epic, Test Execution, Test Plan and Story)
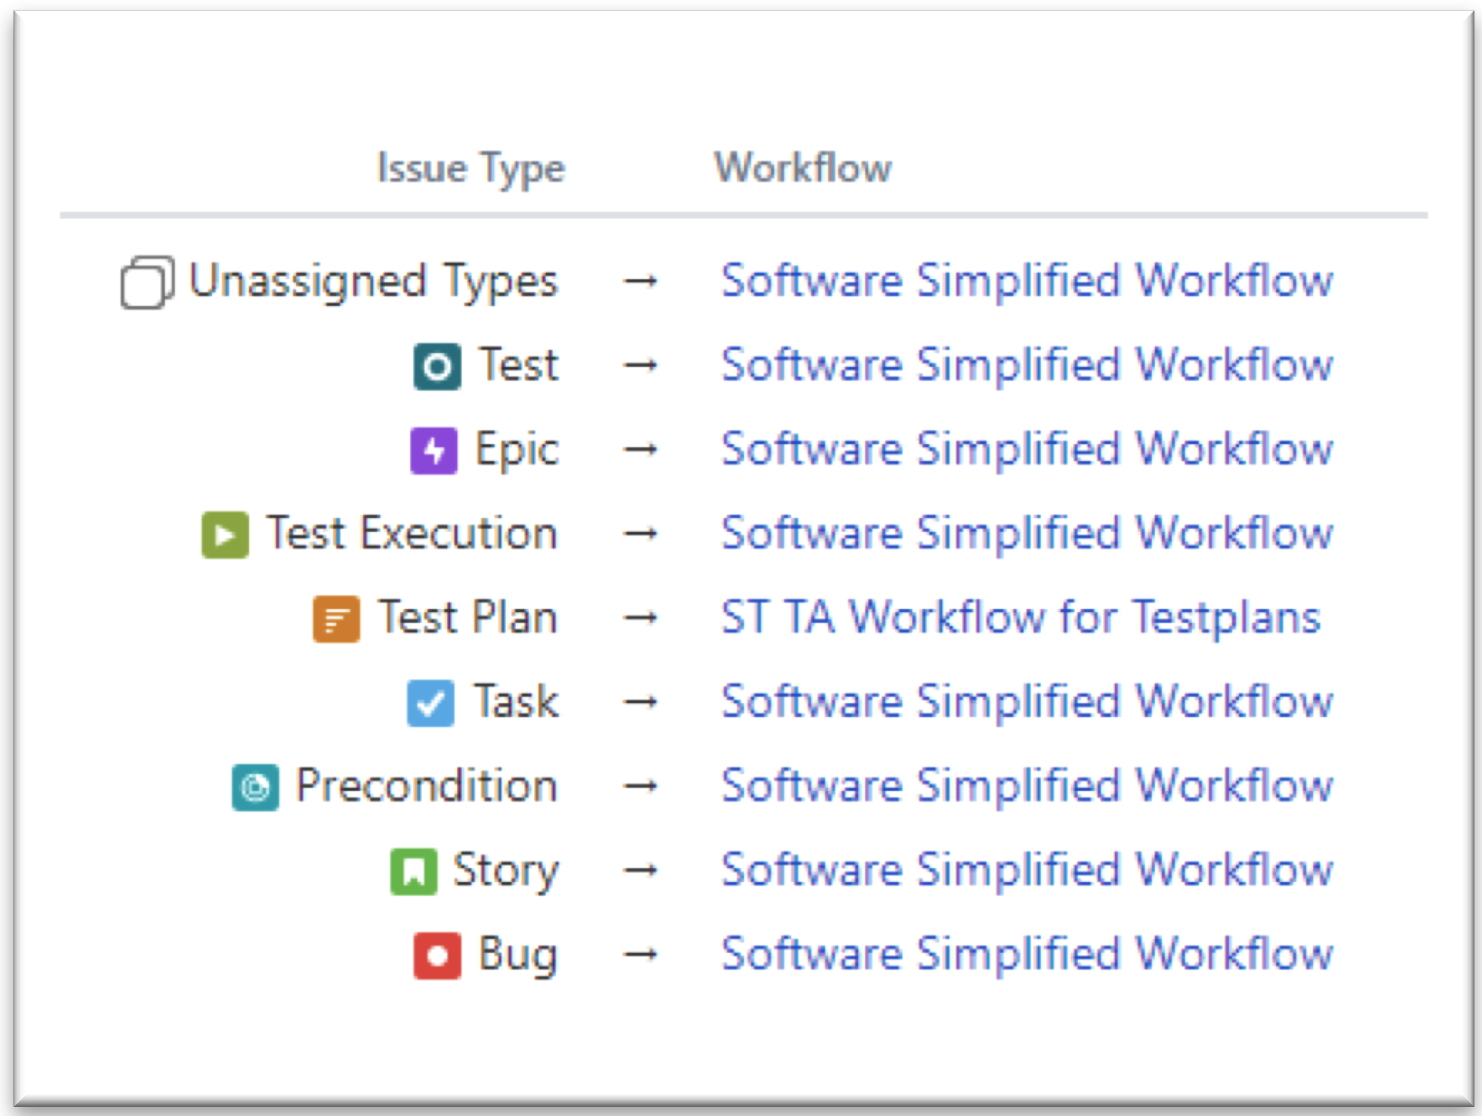
  • In project settings enable the ST TA Workflow for the Test Plan issue type

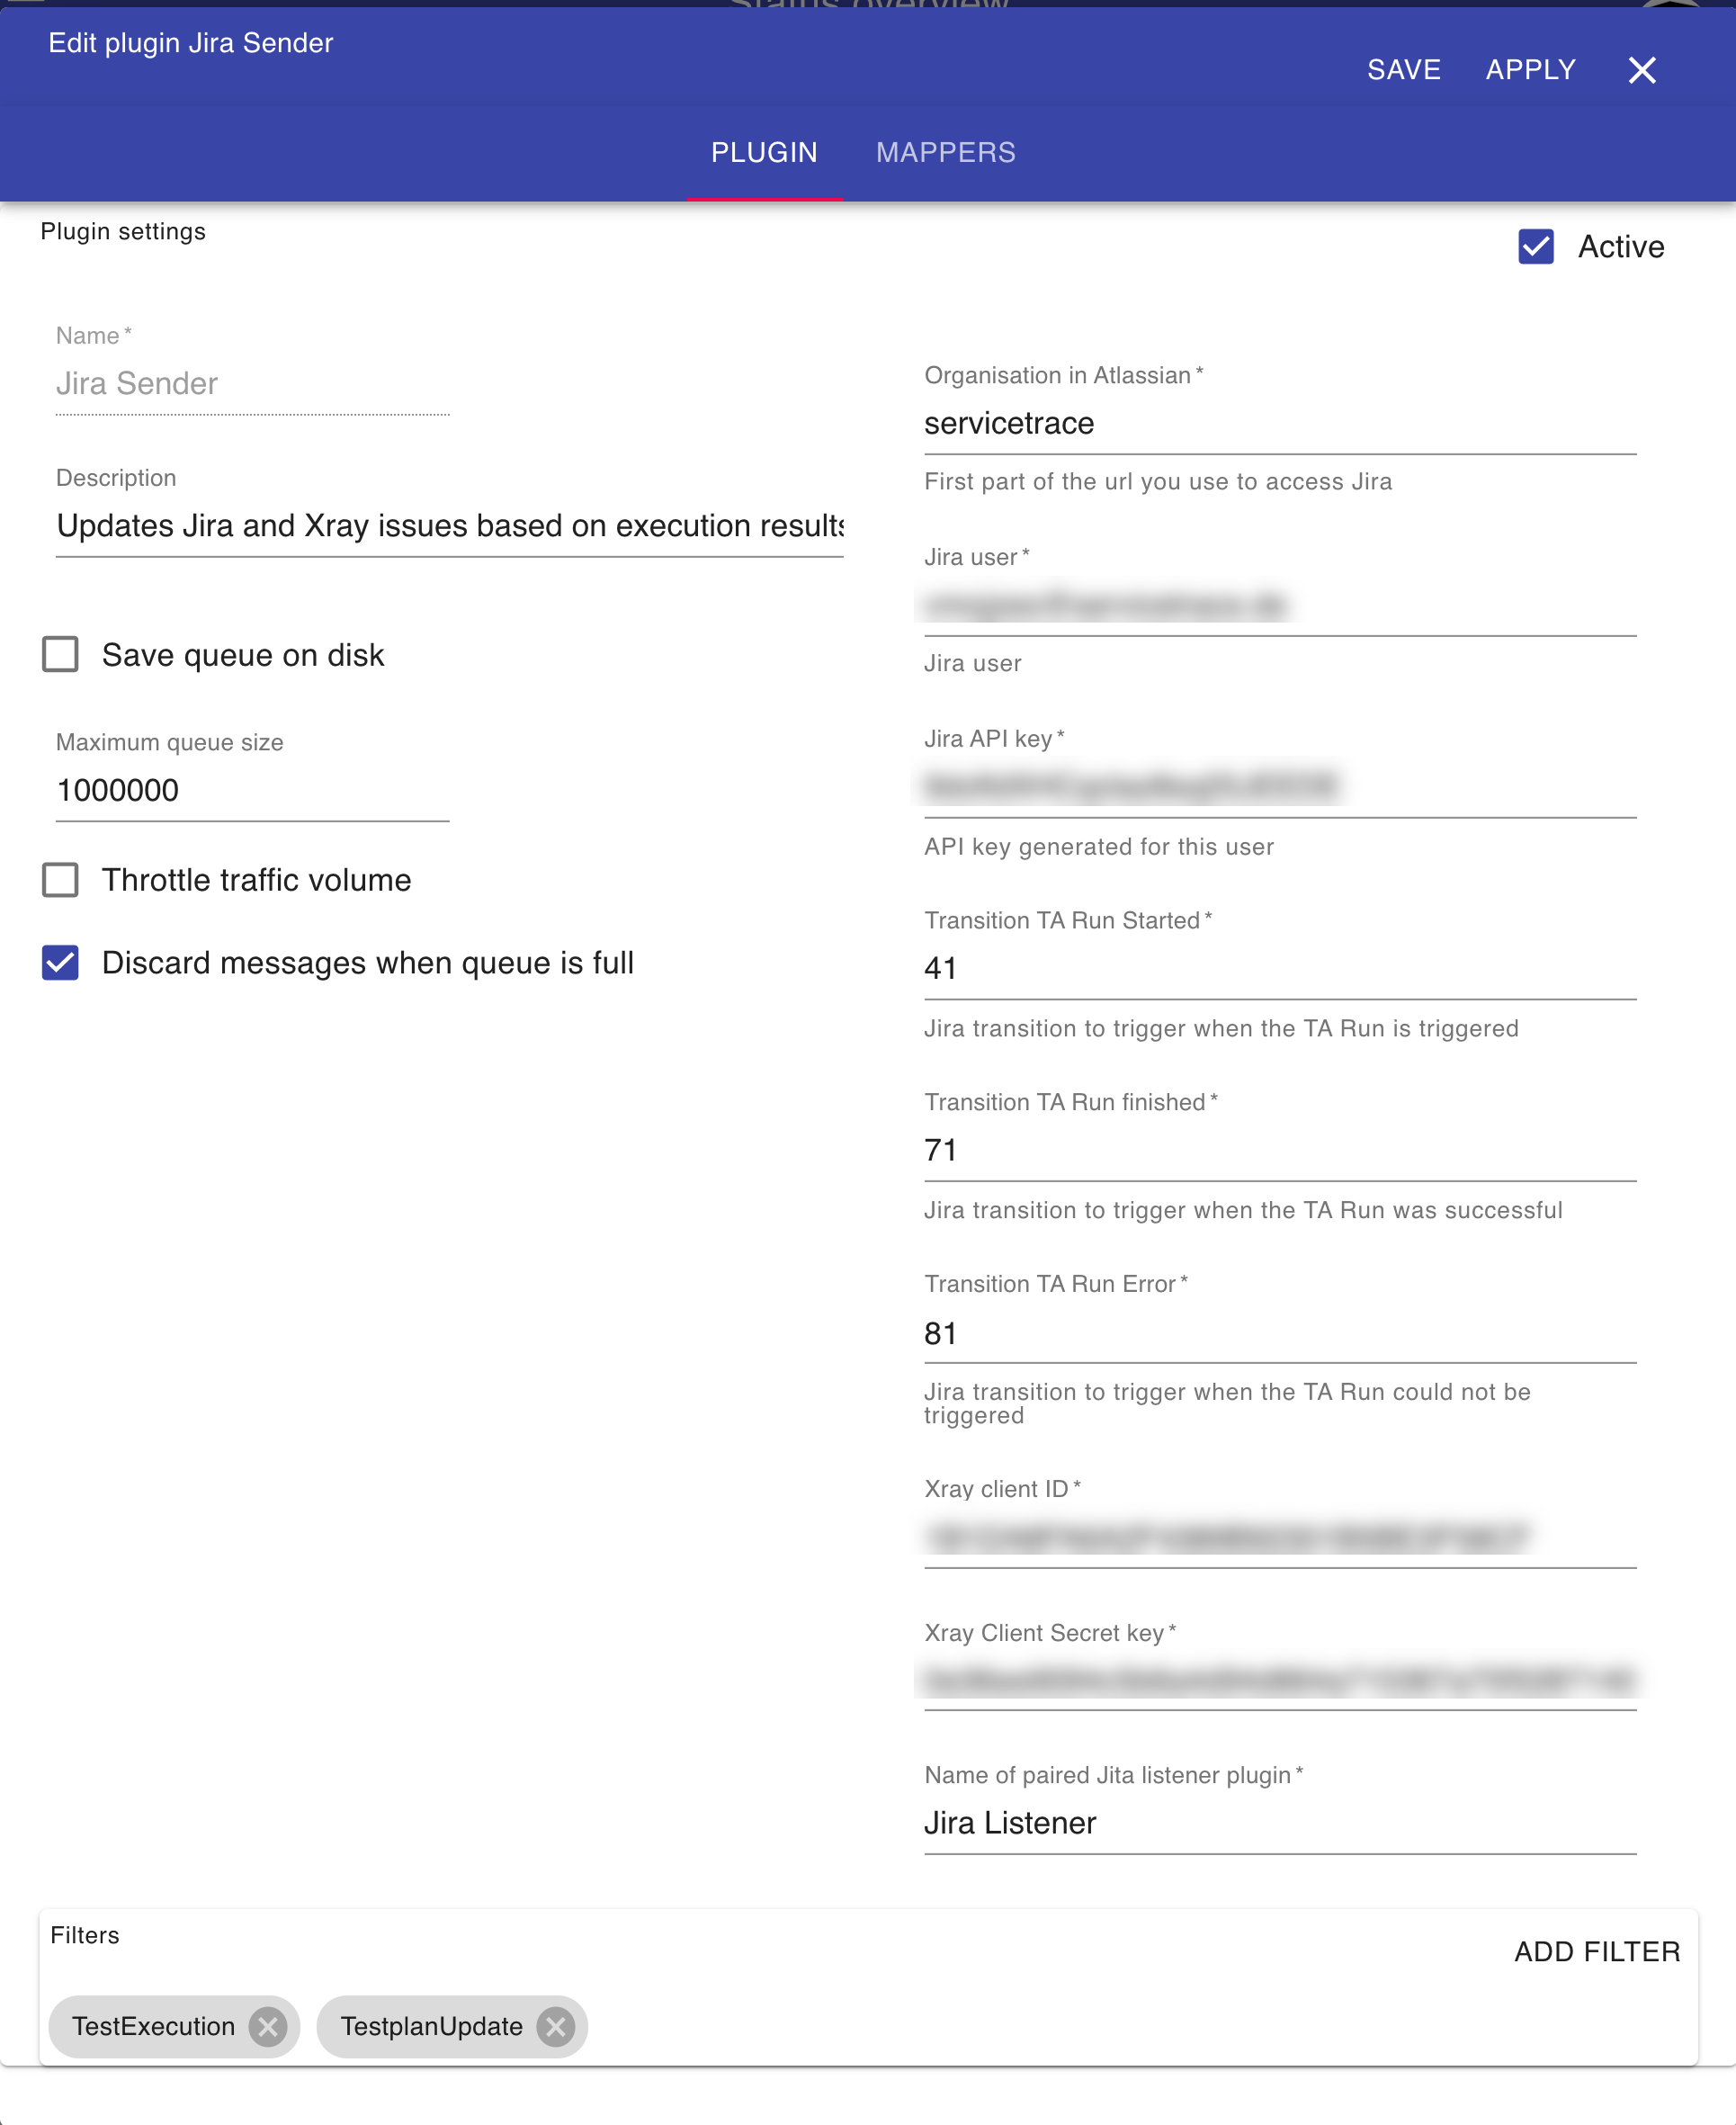
Configure your 1Gateway plugins: insert your transition Ids of the Jira testplan workflow into the Jira Sender plugin and your project keys into the plugin configuration.

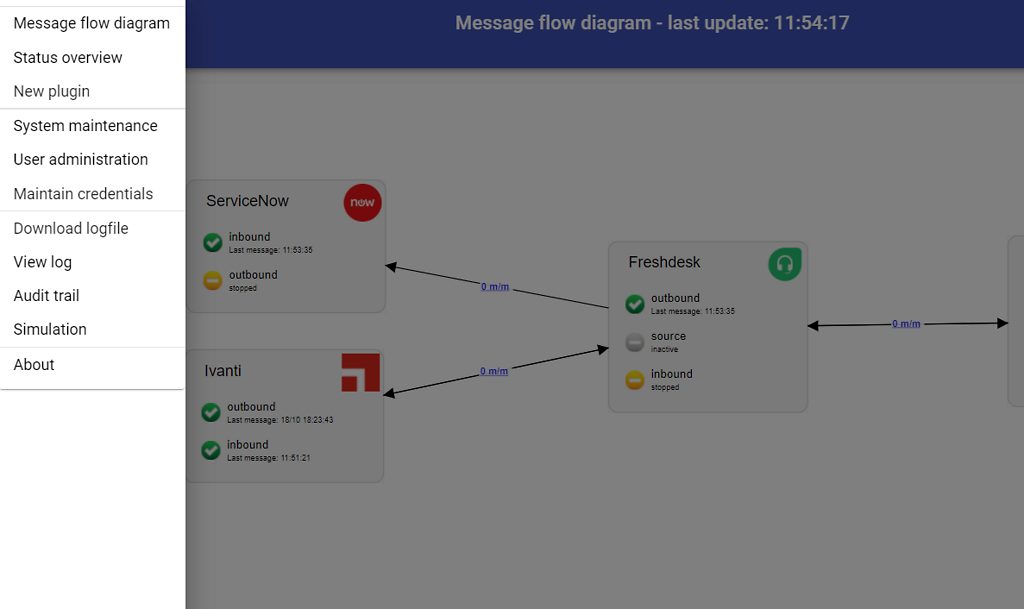
Now you should see all your selected Jira projects in Servicetrace Testautomation.


Installation

Make sure you have the 1gateway zip file that includes the plugin files and valid licences information ready. This file has been provided to you with the installation files.

1 - Login

Login to 1gateway, and make sure you are in "Advanced mode". If this is the first time you log in, the default user and password are both 'admin' (without the quotes).

2 - System Maintenance

Click on the menu icon and choose the option "System maintenance"


3 - Upload file


In the System maintenance view you can either drag and drop the downloaded zip file or select it by clicking the "choose file" button.

4 - Restart

After the upload installation will be confirmed. Restart 1Gateway to ensure any locked files are updated.

Configuration


Open the main menu and click on "New plugin"

Select the plugin you want to configure. Use the Filter field if needed.

FieldValueDescription
Jira URLhttps://servicetrace.atlassian.netThe URL of your Jira instance
Jira user
Jira username
Jira API key
API key for this user
Transition TA Run Started
The number of the transition to run when Test Automation starts to run the test plan
Transition TA Run finished
The number of the transition to run when the Test Automation execution ends
Transition TA Run Error
The number of the transition to run when the Test Automation run failed 
XRay client id
The client ID used to logon to XRay
XRay client secret key
The key used to logon to XRay
Paired Jira Listener plugin
The name of the Jira Listener plugin that pairs with this sender


See also