Jira to TestAutomation integration
Step-by-step
- Configure Jira custom fields and transitions
- Install 1Gateway
- Install plugins and licenses package
- Restart 1Gateway
- Configure Test Automation Sender plugin
- Configure Jira Listener plugin
- Configure Jira Sender plugin
Overview
The Jira - Test Automation integration uses three plugins:
Test Automation Sender is designed to drive Servicetrace TestAutomation activity from within Jira, and to send test results back to Jira.

Image 1. Jira listener plugin configuration
Jira configuration
For the Jira - Test Automation integration to work optimally, a number of custom fields and workflow transitions are required in Jira.
1. Create two custom field: ST TA Robot and Custom ST TA screen resolution for the testplan issue type (Jira Administration -> Issues -> Custom Fields)
ST TA Robot: select list (single choice). Here you should make a list from your Servicetrace robot names (not robot ID)
ST TA Screen resolution: select list (single choice). Here you should insert the screen resolution you use in Servicetrace Test Automation Workflows (for example: 1920x1080 or 1920x1200)

2. Import the ST TA Workflow in your system. (Jira Administration -> Issues -> Workflows)
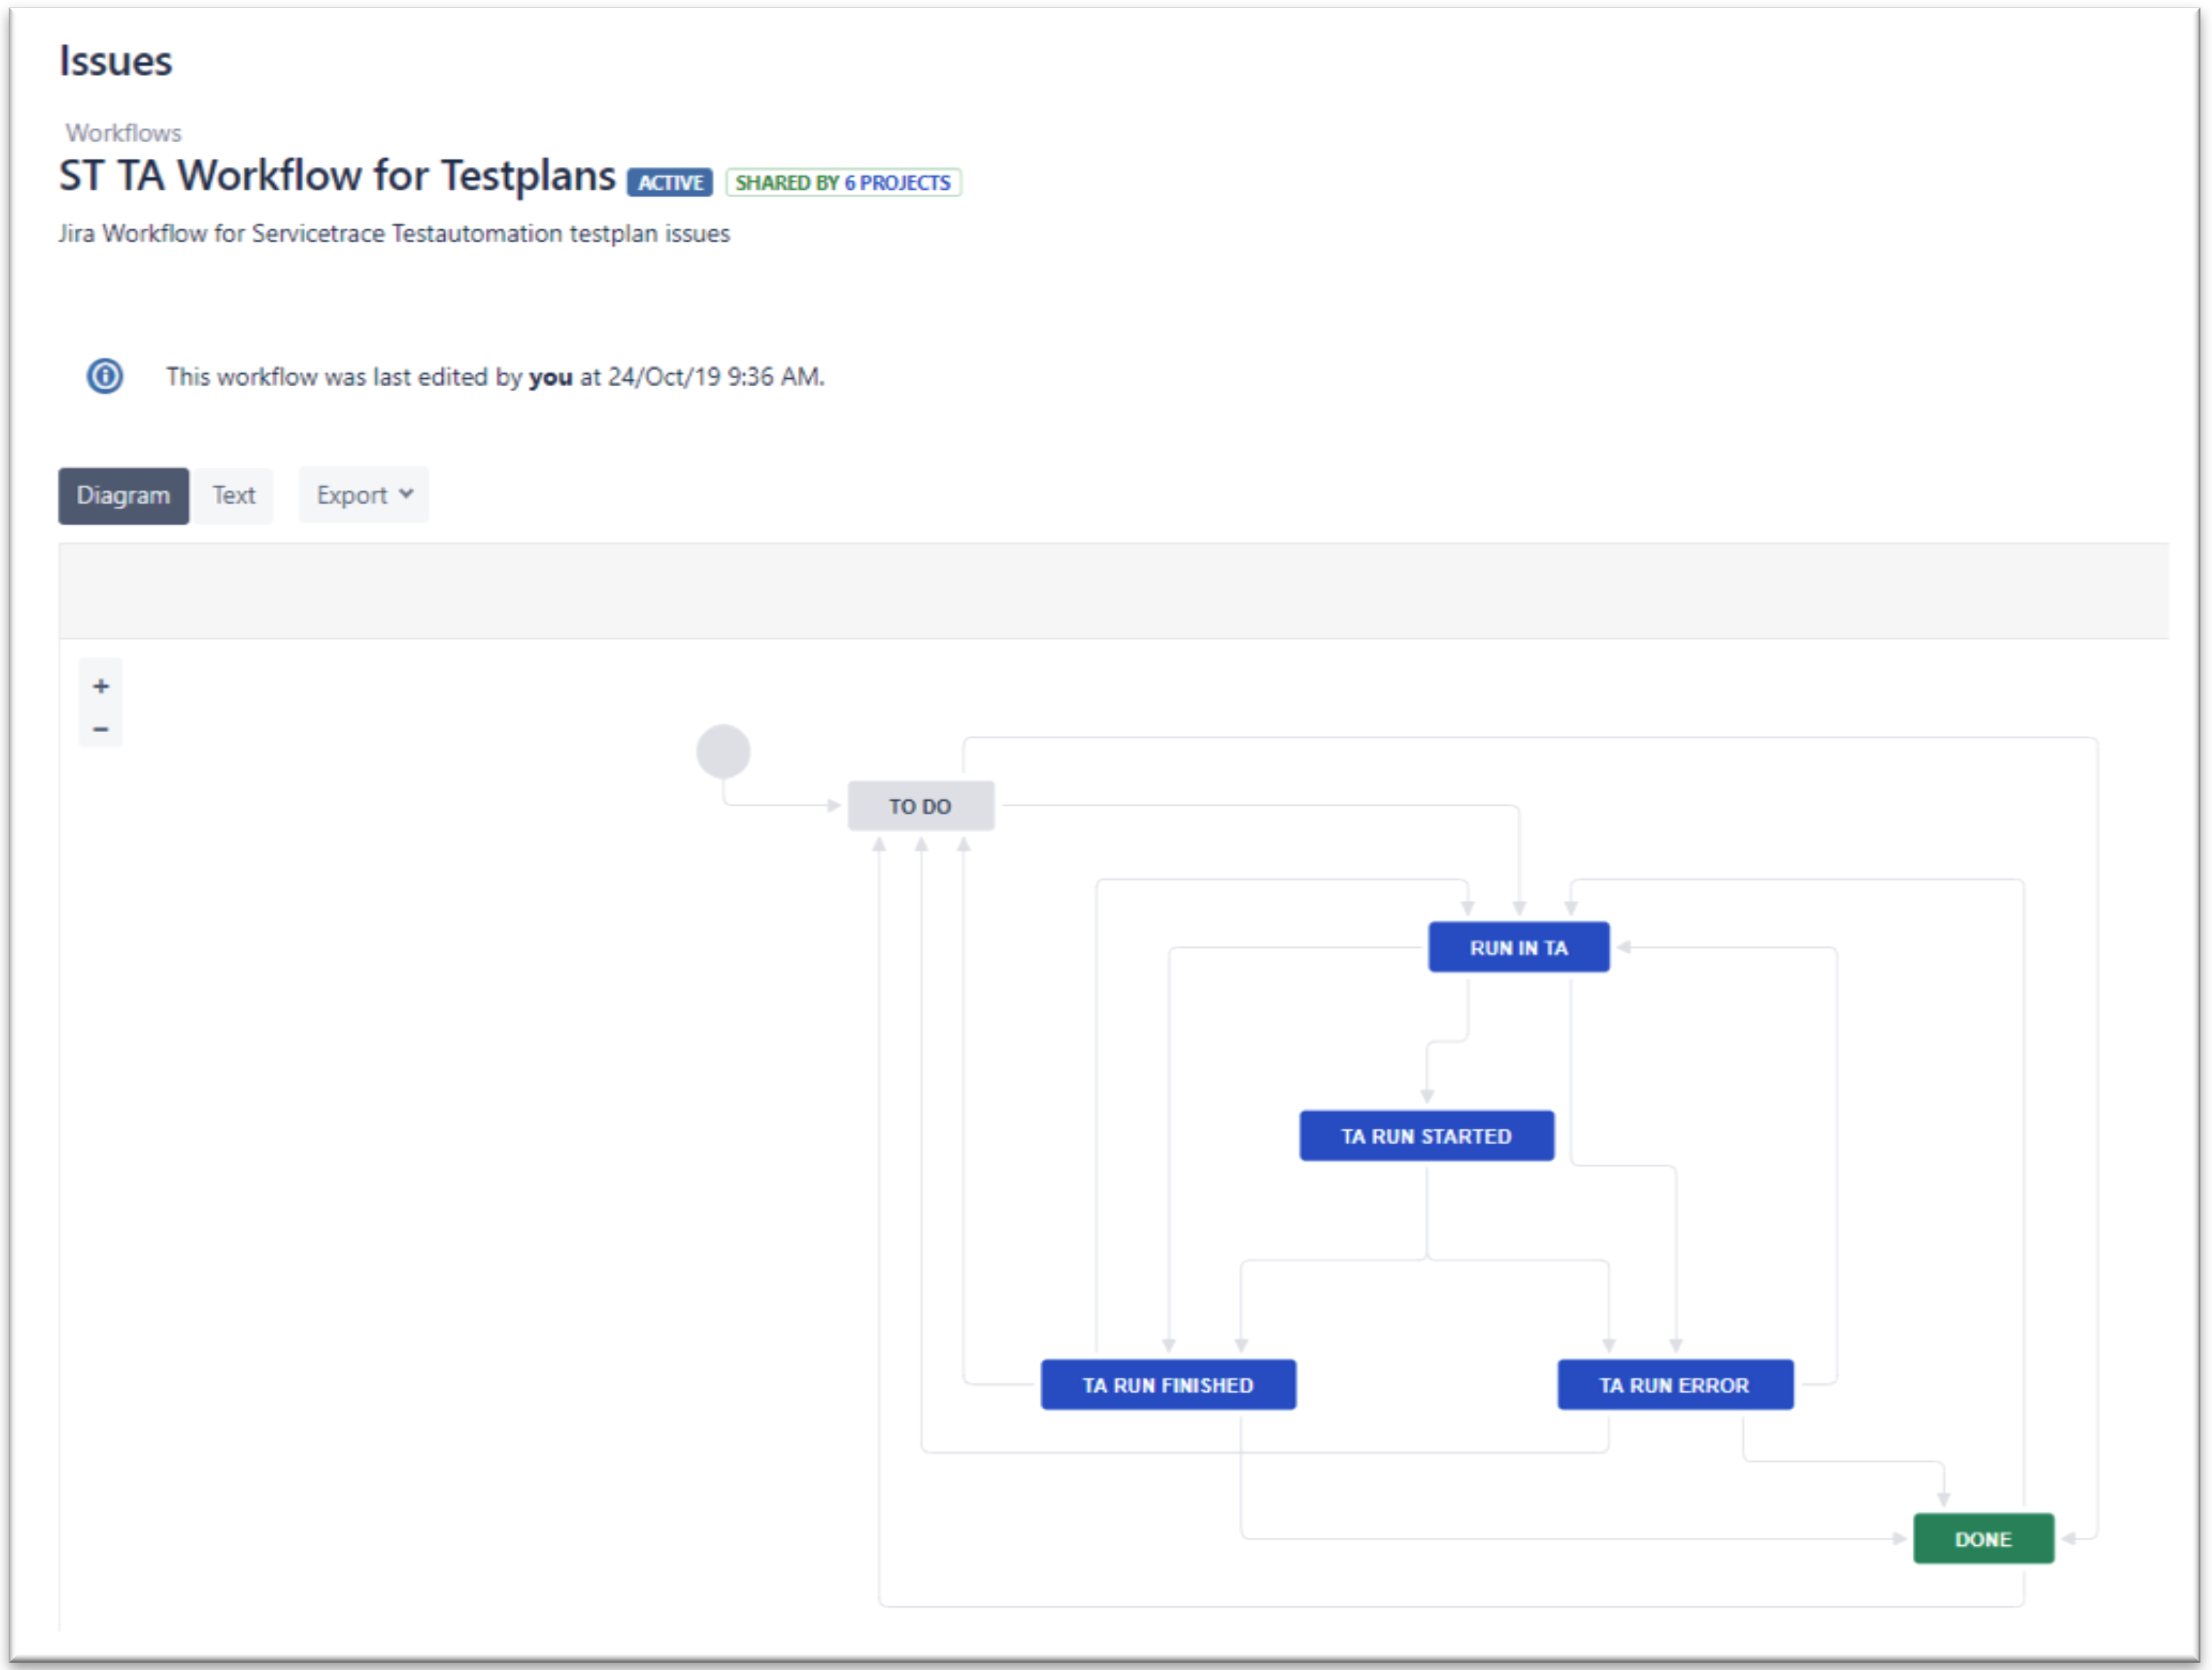
- Create your projects in Jira (classic project, not next-gen project)
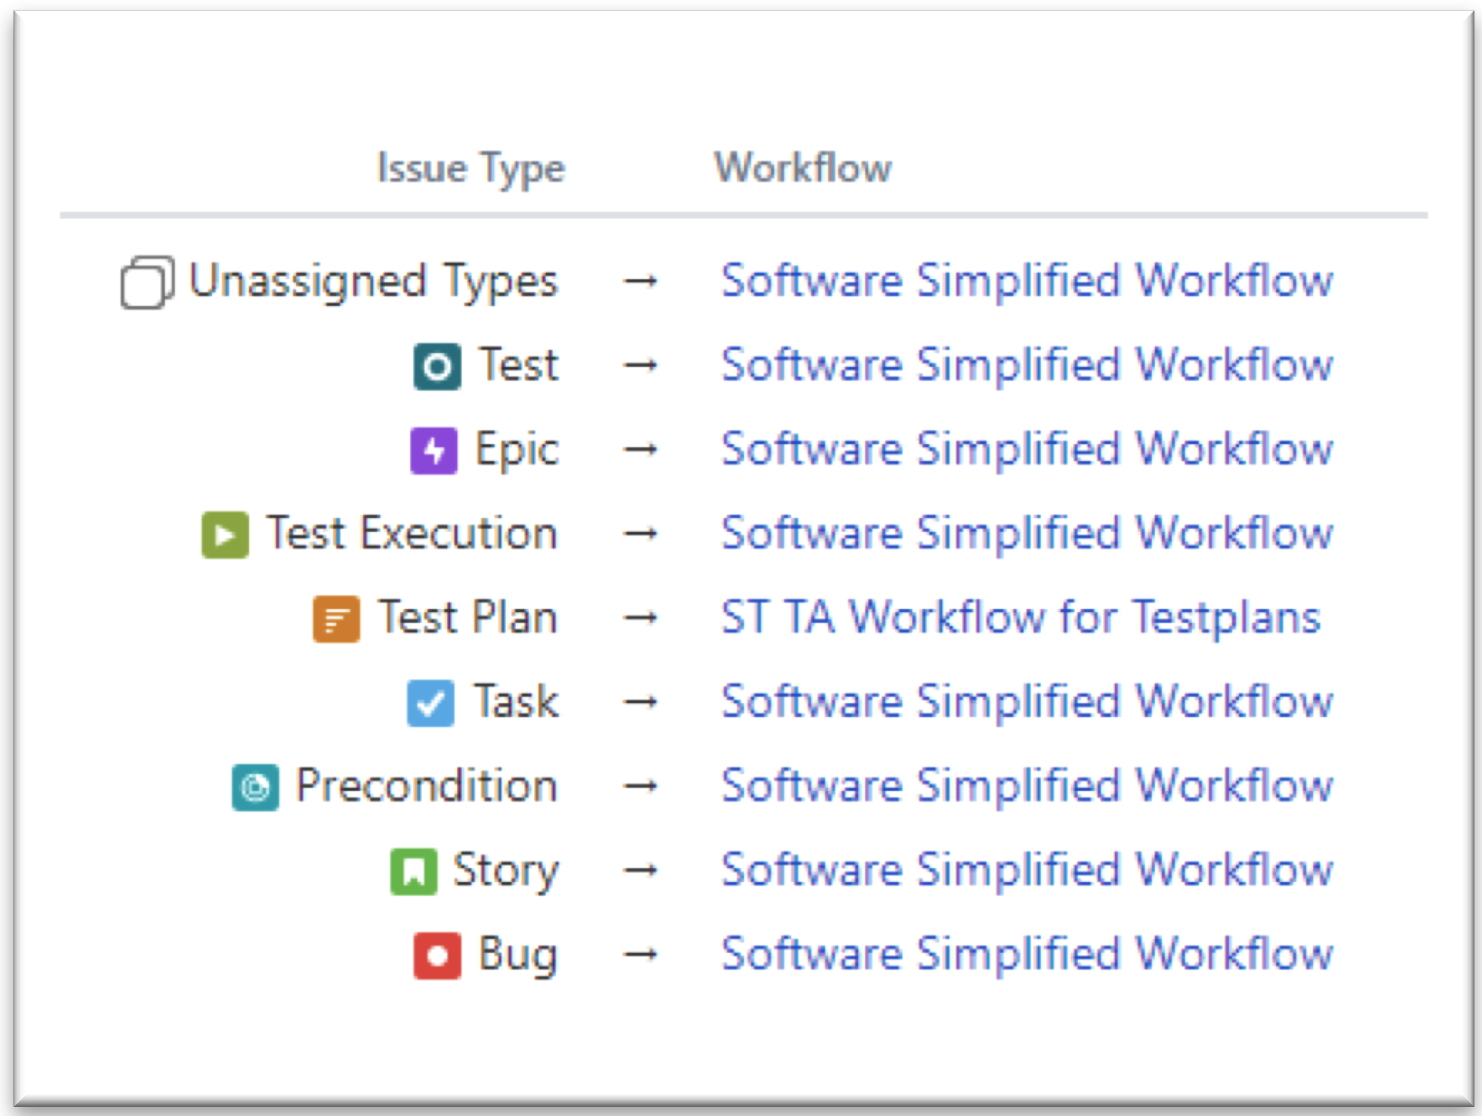
- Enable Xray for the projects (make sure you have the Xray issue types, at least Test, Epic, Test Execution, Test Plan and Story)
- In project settings enable the ST TA Workflow for the Test Plan issue type
Configure your 1Gateway plugins: insert your transition Ids of the Jira testplan workflow into the Jira Sender plugin and your project keys into the plugin configuration.
Now you should see all your selected Jira projects in Servicetrace Testautomation.
Installation
First install 1Gateway:
This documentation is for the on-premise edition of 1Gateway. The SaaS edition is documented in the customer portal.
Requirements
Minimum installation requirements are:
- Java 1.8
- MySQL 8
- 2 CPU cores
- 8GB RAM
- 4GB free disk space
For a busy production system we recommend 16GB RAM and 4 CPU cores.
The UI is supported on Google Chrome and Firefox.
1Gateway is packaged in three different ways:
- as a windows installer
- as a zip file
- as a Docker image
Docker installation
To install 1Gateway as a Docker container (including mysql), run this command (docker-compose.yaml is located in the 1Gateway Root Directory):
docker-compose upFor the next steps, jump to plugin and license installation
Zip installation
To install 1Gateway from the zip file, simply extract the zip file to a folder of your choice and run the startup shell script. For the next steps, jump to plugin and license installation
Windows installation
As a user with administrator rights, run the Windows installer. The installer package for windows is called 1Gateway-2.3-[buildinfo].exe.
Run 1Gateway-2.3-buildinfo.exe

If this window appears, click on Yes
Accept the EULA
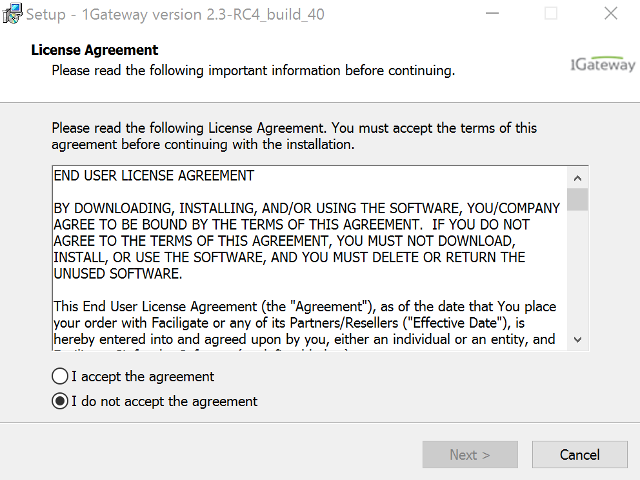
Accept the 1Gateway EULA
Select folder
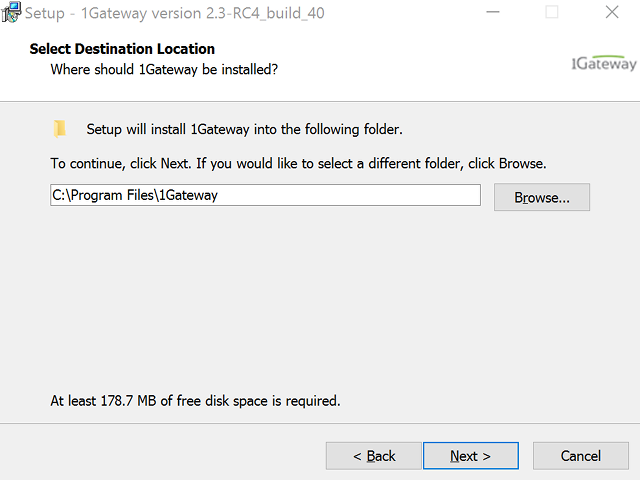
Next
Install

Click on "Install"
Watch progress

Pay close attention to the progress bar as it inches to completion
Finish
1Gateway is now installed and running as a service.
Log in to 1Gateway
Launch a browser, preferably Chrome, and navigate to http://your-1gateway-server:8090. Login as user admin, password admin.
Install plugins and licenses
Make sure you have the 1gateway zip file that includes the plugin files and valid licences information ready. This file has been provided to you with the installation files.
1 - Login

Login to 1gateway, and make sure you are in "Advanced mode". If this is the first time you log in, the default user and password are both 'admin' (without the quotes).
2 - System Maintenance

Click on the menu icon and choose the option "System maintenance"
3 - Upload file

In the System maintenance view you can either drag and drop the downloaded zip file or selected it by clicking the "choose file" button.
4 - Restart

After the upload installation will be confirmed. Restart 1Gateway to ensure any locked files are updated.
Configure the plugins
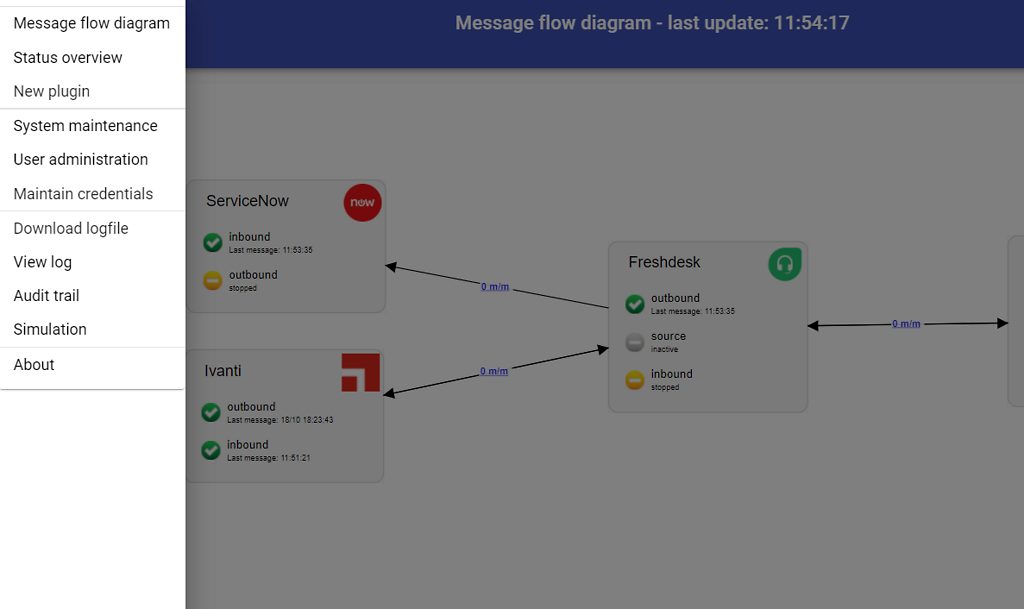
Open the main menu and click on "New plugin"

Select the plugin you want to configure. Use the Filter field if needed.
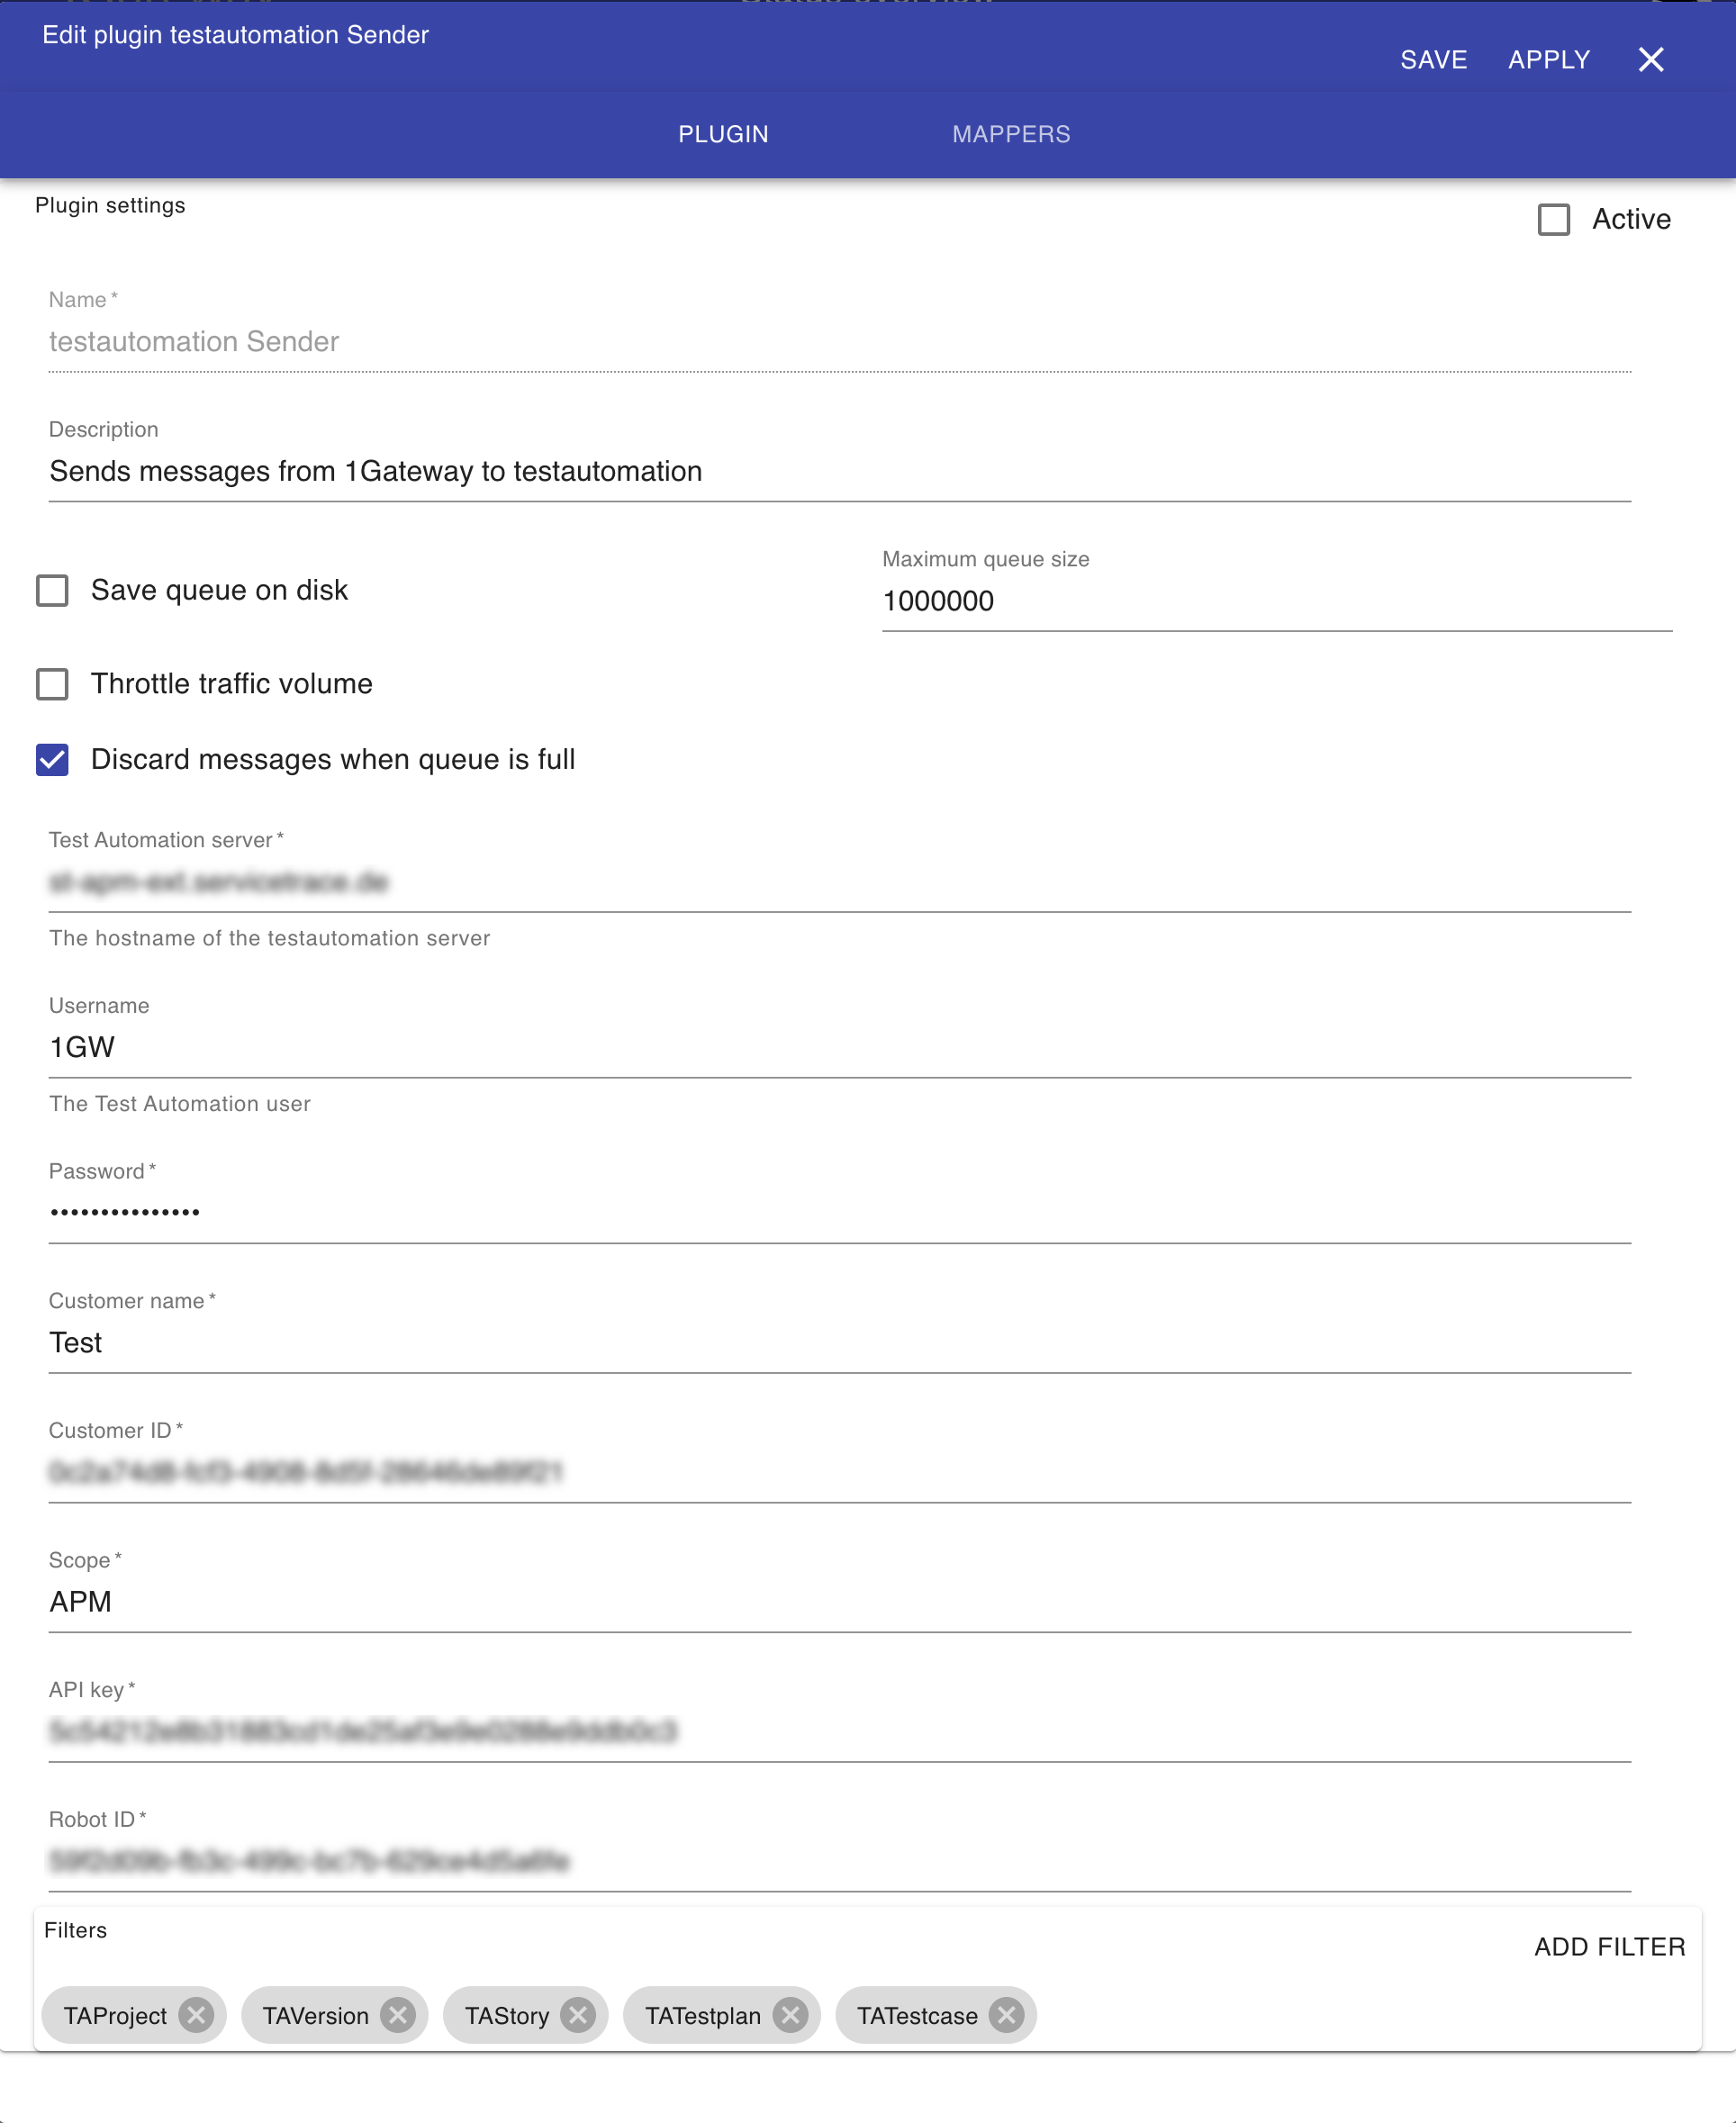
Test Automation Sender
| Field | Value | Description |
|---|---|---|
| Test automation server | The hostname or IP address of your Test Automation server | |
| Username | User name to logon to TA | |
| Password | The user's password | |
| Customer name | The name of the customer in TA | |
| Customer ID | The ID of that customer in TA | |
| Scope | APM | The scope ? |
| API key | The API key to use in TA | |
| Robot ID | The default robot to use for test executions, only when no robot is specified in the testplan in Jira. |
Jira Listener
Field name | Supported values | Description |
|---|---|---|
Oranization | Any string | The organization that owns the Jira projects |
Username | Any string | Jira username |
Password | Any string | User's password |
Polling interval | Any string | Polling interval in seconds (default is 300) |
Epics | true / false | Defines if to poll jira epics |
User stories | True / false | Defines if to poll jira user stories |
Test plans (Xray) | True / false | Defines if to poll Xray test plans |
Test cases (Xray) | True / false | Defines if to poll Xray test cases |
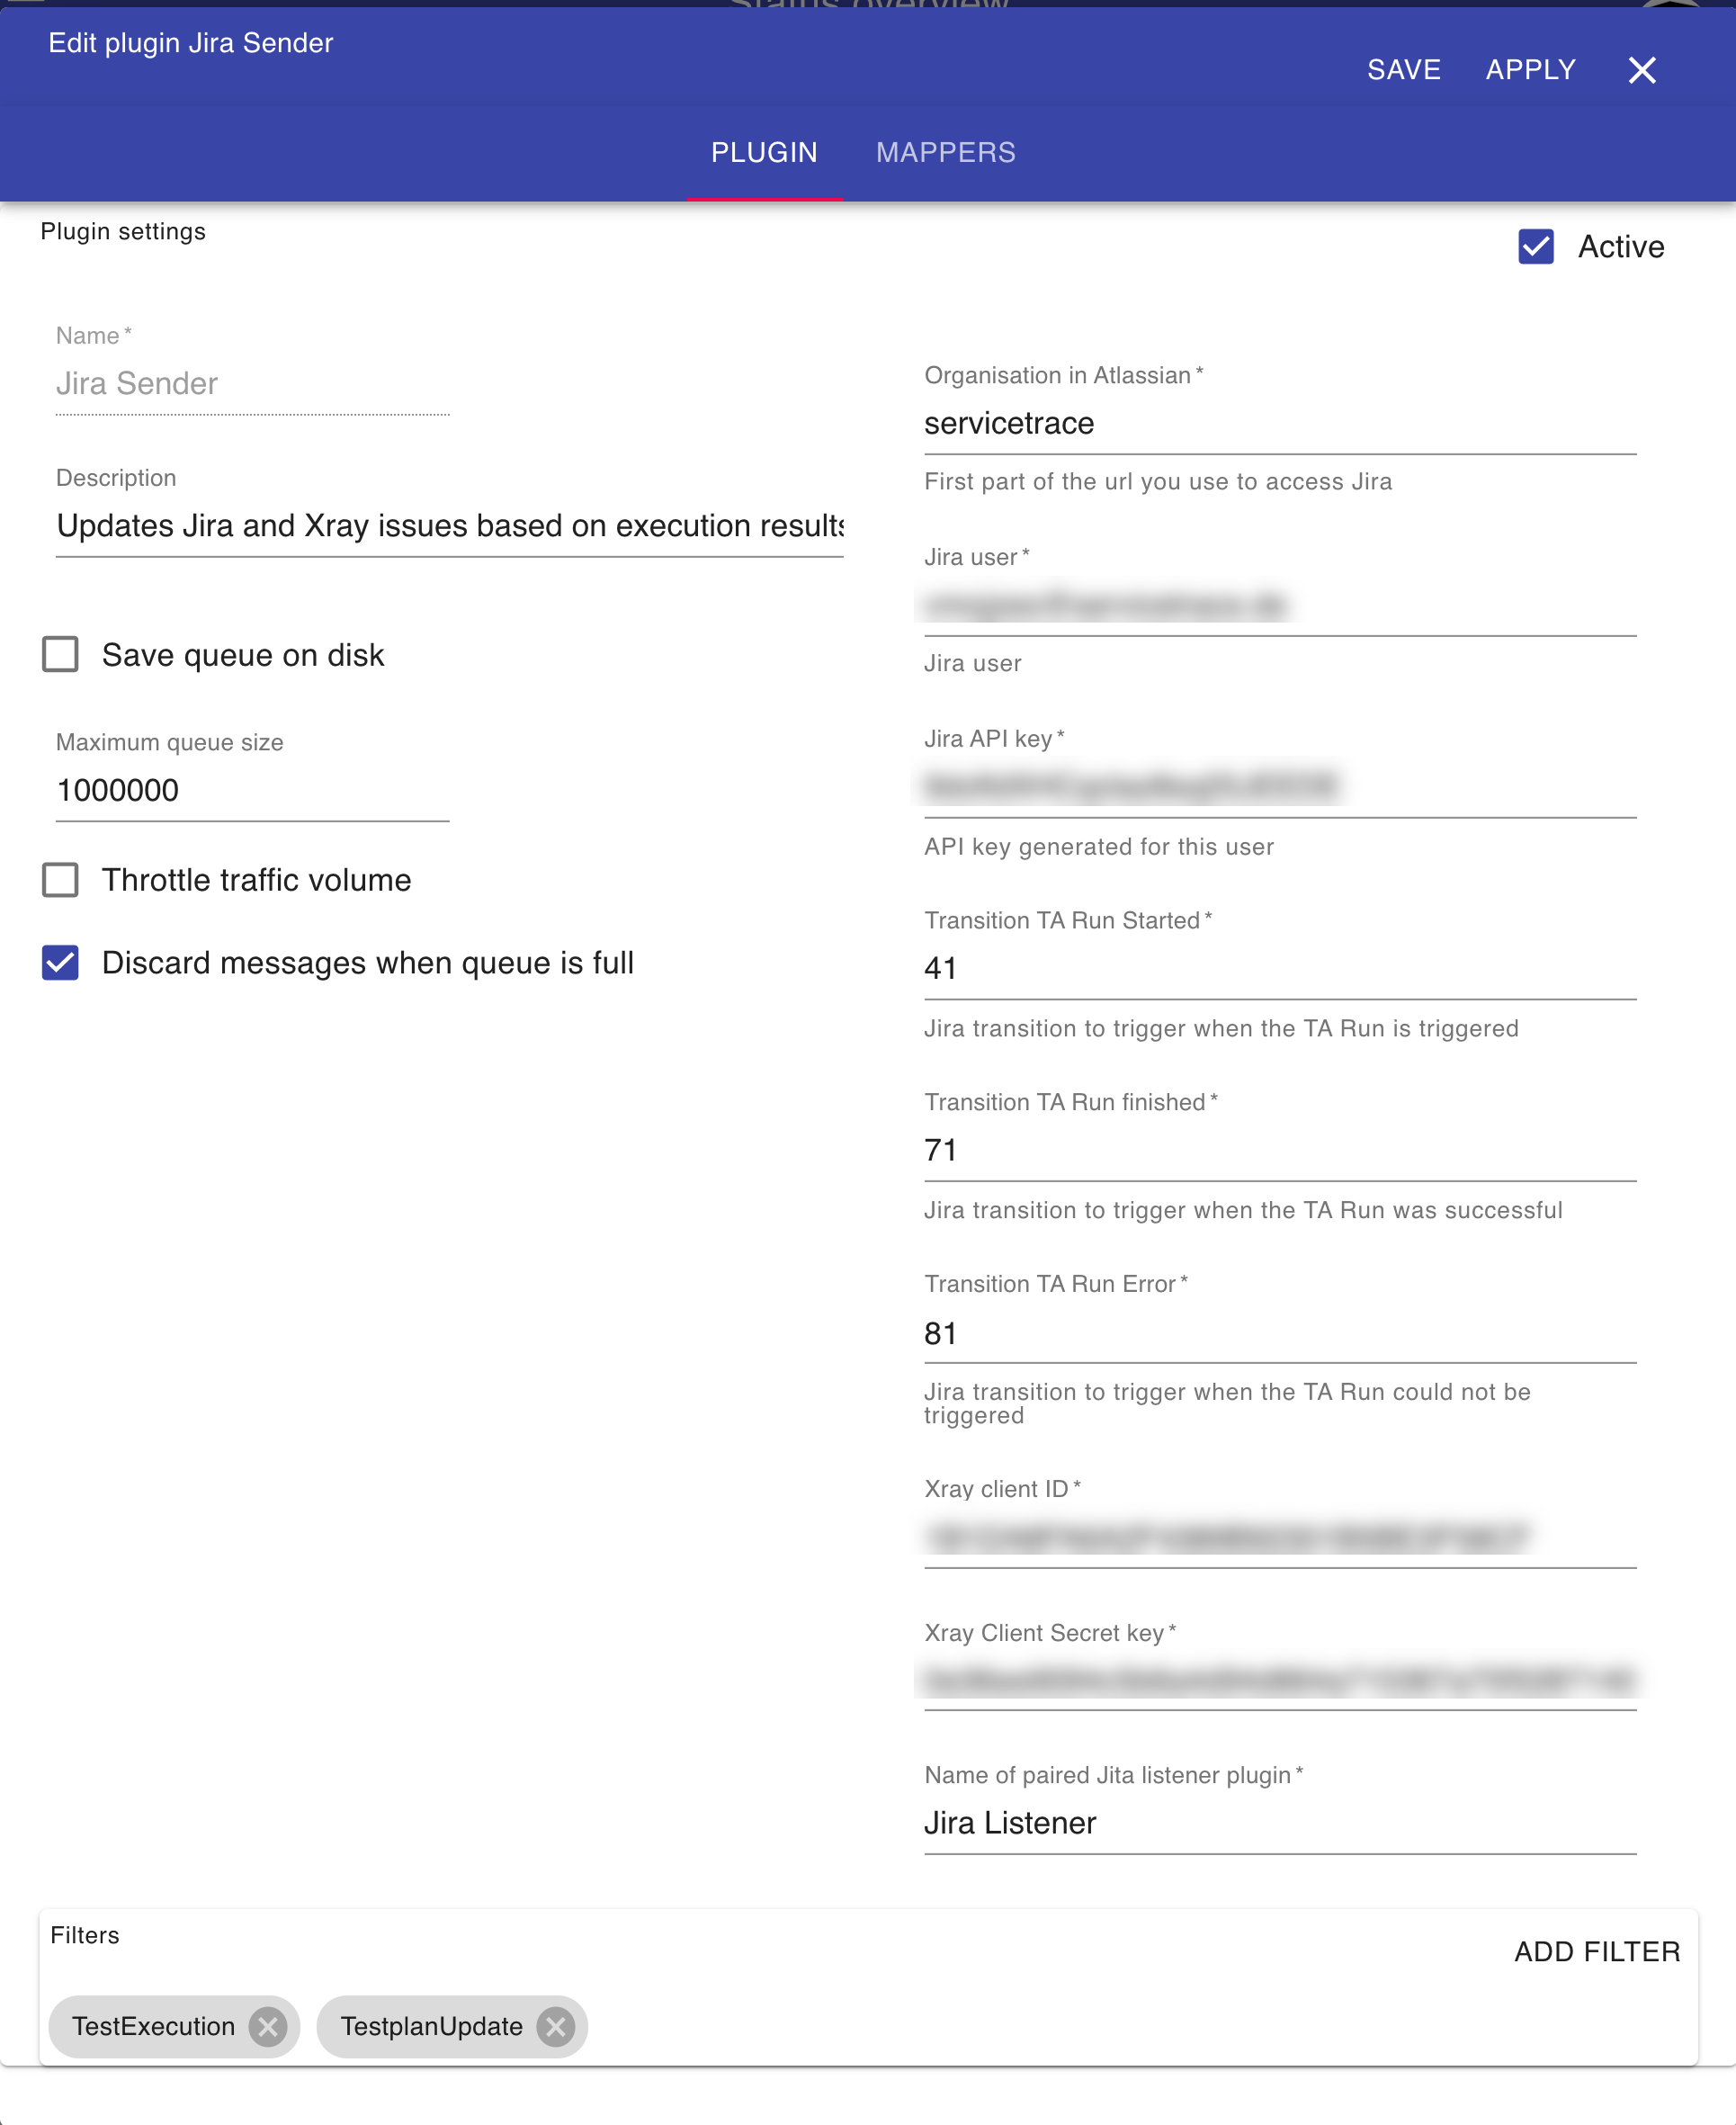
Jira Sender
| Field | Value | Description |
|---|---|---|
| Jira URL | https://servicetrace.atlassian.net | The URL of your Jira instance |
| Jira user | Jira username | |
| Jira API key | API key for this user | |
| Transition TA Run Started | The number of the transition to run when Test Automation starts to run the test plan | |
| Transition TA Run finished | The number of the transition to run when the Test Automation execution ends | |
| Transition TA Run Error | The number of the transition to run when the Test Automation run failed | |
| XRay client id | The client ID used to logon to XRay | |
| XRay client secret key | The key used to logon to XRay | |
| Paired Jira Listener plugin | The name of the Jira Listener plugin that pairs with this sender |